To take advantage of the new features that vRA 6.2 has to offer, it’s time to upgrade. The upgrade will make it easier to transition from the vCAC branding to vRA. This was also a good time to start thinking about how to go about the process.
Upgrade Choices
- Download Updates directly from VMware – requires internet access.
- Internal repository (offline bundle) – restricted internet access.
- Update with CD-ROM – restricted internet access / requires enabled CD-ROM.
The easiest way to update is from the VMware repository using the internet. I had to consider my past experiences working in silo environments. Then I had to think about my current role as a consultant and my customers. With these experiences in mind it made more sense to explore other options. Update with CD-ROM is the second easiest but I had consider who has access to what. The person applying the updates may not be the same person who has access to edit the VMs. We also have a tendency of downloading the same ISO several times when we can’t find it. The worst is having several copies of the same ISO scattered in different directories on the network. It made more sense to create a centralized repository for updates. The repository would provide more control and management over which updates are available. This would be a guaranteed method for servers with limited or no internet access to receive updates. Finally, if the server has repository access, it eliminates worrying over user VM permissions.
This post will walk through the configuration of a repository on a Windows Server. Why Windows? Well I already have a Windows Server 2012 R2 server available for management. Also I couldn’t find documentation on setting one up, fair enough? 🙂
Windows Server 2012 R2
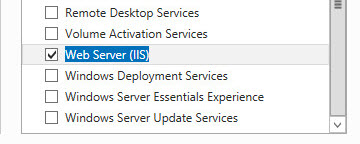
- Add the Web Server (IIS) server role.
![]()
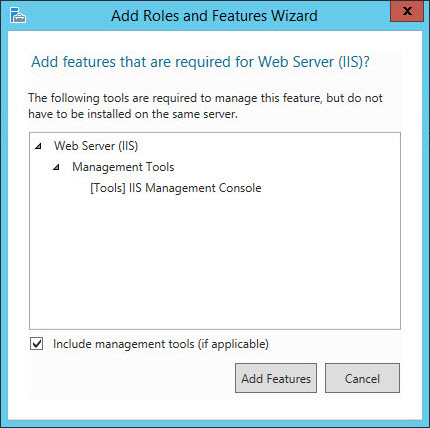
- Add the prompted features required for the Web Server (IIS).
![]()
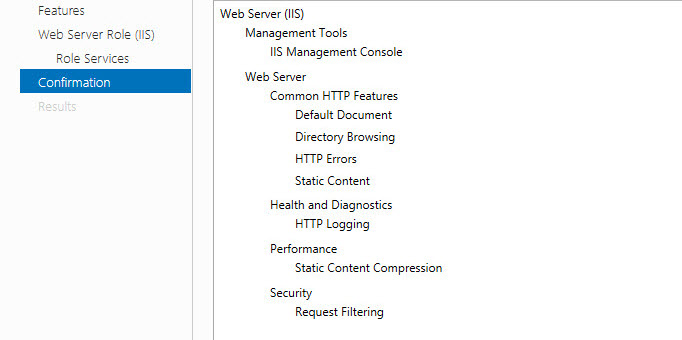
- Take the defaults on Features,Web Server Role (IIS), Role Services and click Next.
- Confirm all the setting you selected are correct and click Install.
![]()
- Create a directory for your repository.
Note: You can always go back and add other features, if needed.
Setting up IIS
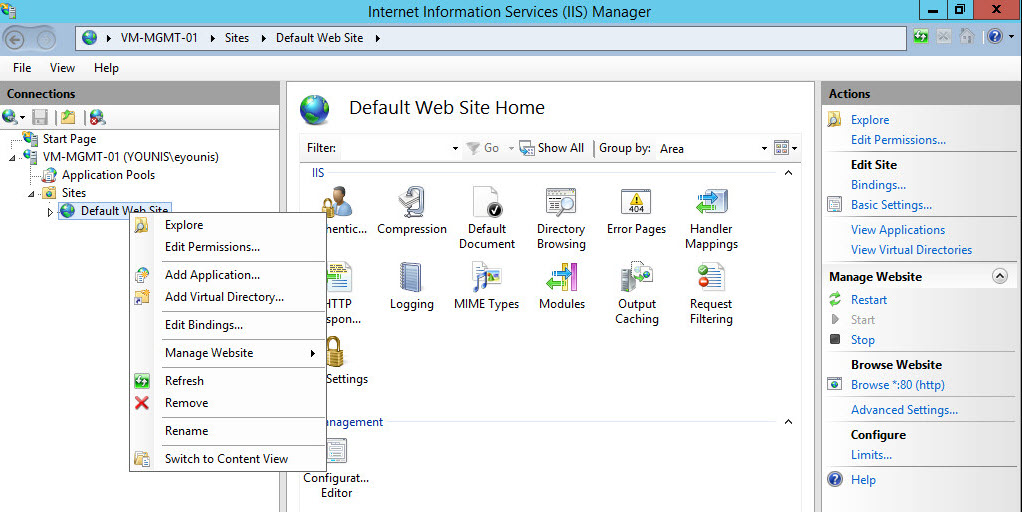
- Open IIS Manager.
- In the Connections Pane expand the server.
- Expand Sites and right click Default Web Site, select Add Virtual Directory.
Note: Here I’m using the Default Web Site, but a new one can be created if you choose.
![]()
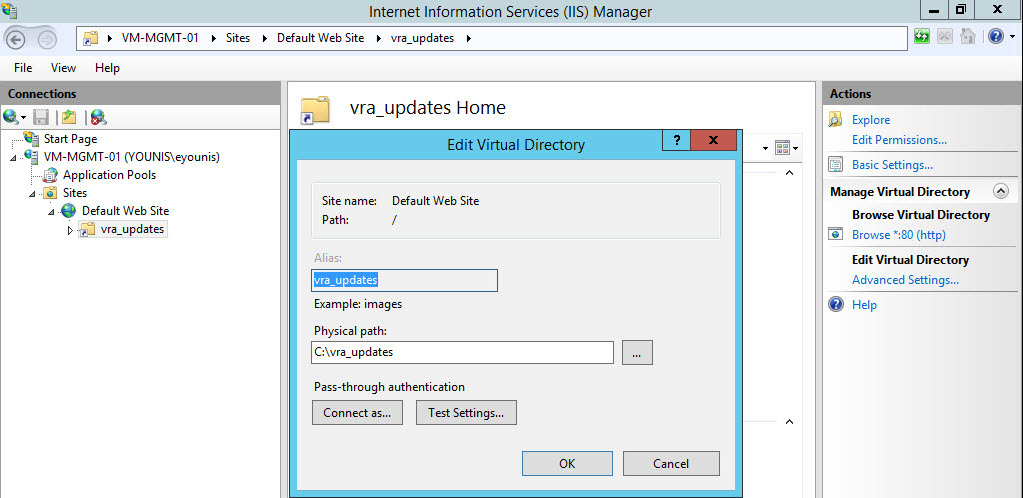
- Add an Alias and Physical path.
![]()
- Click Test Settings, make sure at least you pass authentication, click Close and OK.
- Double click on Directory Browsing, set the action (right side) to enable.
![]()
- Open a web browser and verify access to your virtual directory.
![]()
- Go to Default Web Site and select MIME Types.
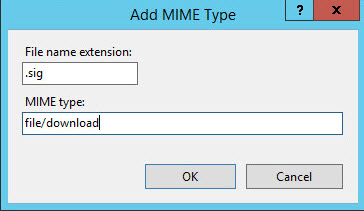
- Add the following MIME type .sig with a file/download type (file located under the manifest directory in updates).
![]()
![]()
- The following command is needed since the update will stop due to the + characters in some of the update files (security risk). More info can be found here.
![]()
%windir%\system32\inetsrv\appcmd set config “Default Web Site” -section:system.webServer /security/requestfiltering -allowDoubleEscaping:true
![]()
Appliance Setup
Note: I will be using the vRA appliance to test.
- Using a web browser navigate to the vRA Appliance management console “https://vRA FQDN:5480” and log in.
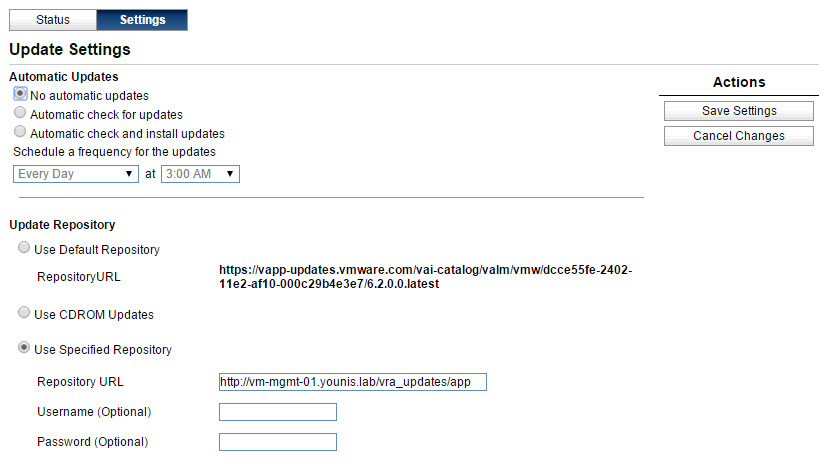
- Go to the Update tab –> Settings.
- Select the use Specified Repository radio button.
- Repository URL will be http://webserver FQDN/virtual directory name/path to update.
![]()
Note: I created a directory for each appliance update - Save Settings.
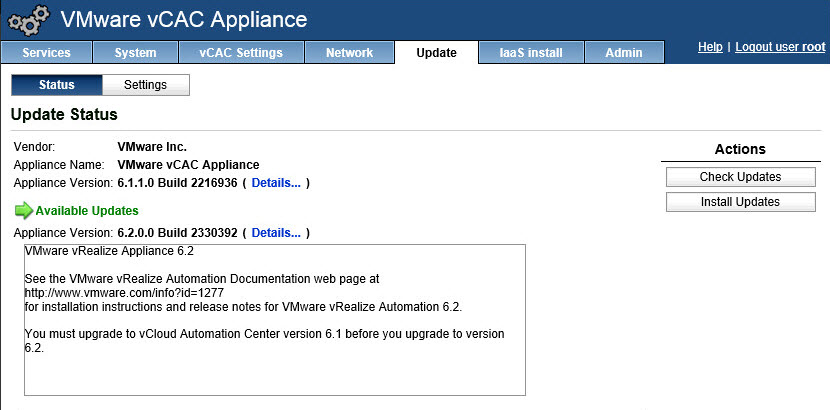
- Go to Status –> Check Updates
![]()
- Click Install Updates.
Note: Update will take a while, which means time for a break! - Once the update is complete, reboot the appliance.
- Validate new version.
![]()
I didn’t focus much on security since this was in my lab. Things to consider are permissions on your directories and adding Secure HTTP. Check the documentation of the appliance(s) to verify supported update methods.

