vRealize Automation 6.1 (formally vCloud Automation Center) – Identity Appliance – Deployment / Configuration
The introduction of Single Sign On (SSO) in vSphere 5.1 has provided a new major dependency of the infrastructure. SSO provides a secure way of authenticating to your vSphere environment. It not only serves as an authentication broker but also a token exchange, so what does this all mean you? In a nutshell this is a handshake.
When logging in a vSphere environment (C# client or Web Client) it sends a token to SSO containing username & password. In turn SSO authenticates against the selected identity source. An identity source can be Active Directory, Open LDAP or Local OS. SSO can also support more than one identity source.
Once the original token authenticates, SSO issues a security token. This becomes your key.

Access to VMware products such as vCenter is now permitted. At this point you must be asking what does SSO have to do with vRealize Automation? Well its simple, vRealize Automation (formerly vCloud Automation Center) or vRA uses SSO as well. In fact SSO is one of the core deployment components, without it vRA would not function.
Before we get started, we have to be sure we have everything we need:
Prerequisites
- DNS (forward / reverse) entry.
- Network Time Protocol (NTP).
- 1 vCPU / 2 GB of RAM / 2 GB of storage.
- Active Directory domain account.
Ports Required for Identity Appliance
[table id=1 /]
Deploying the Identity Appliance
Note : deployment of OVA done from the vSphere Web Client.
- Log in the vSphere Web Client with an account that has administrator rights.
- Select Hosts and Clusters.
- Select an inventory object such datacenter, cluster, host or resource pool.
- Right Click –> Deploy OVF Template or use Actions –> Deploy OVF Template.
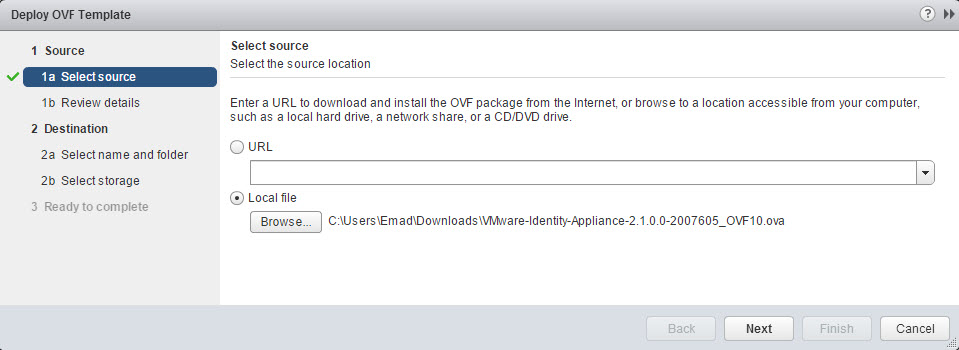
- Select Source location by browsing to the Identity Appliance file with either an extension of “.OVA “or “.OVF “and click Open. Click Next.

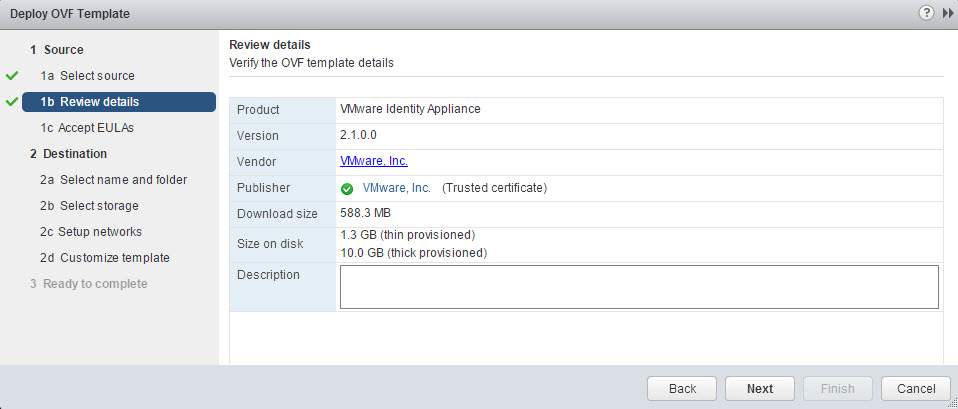
- Click Next on the Review details screen.
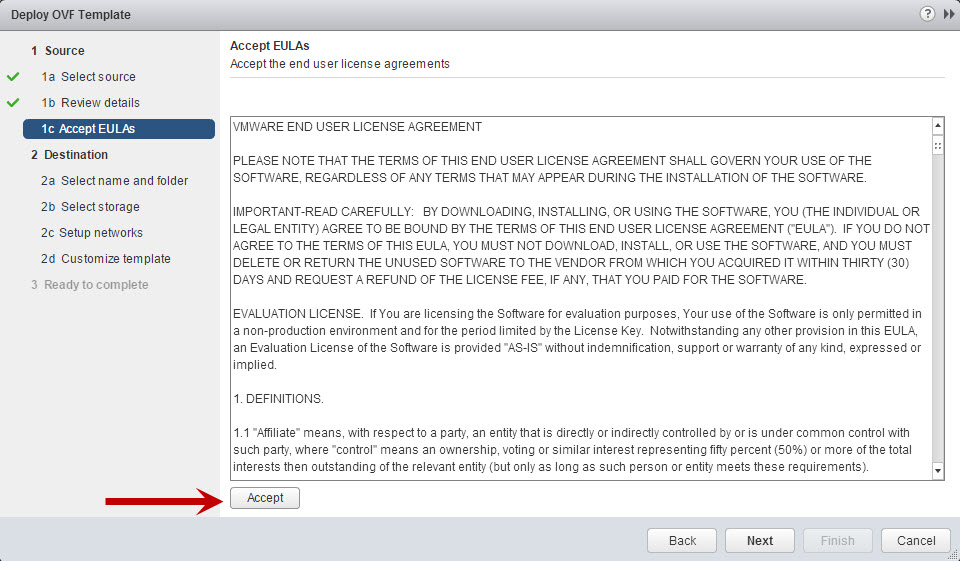
- Accept the EULA and click Next.

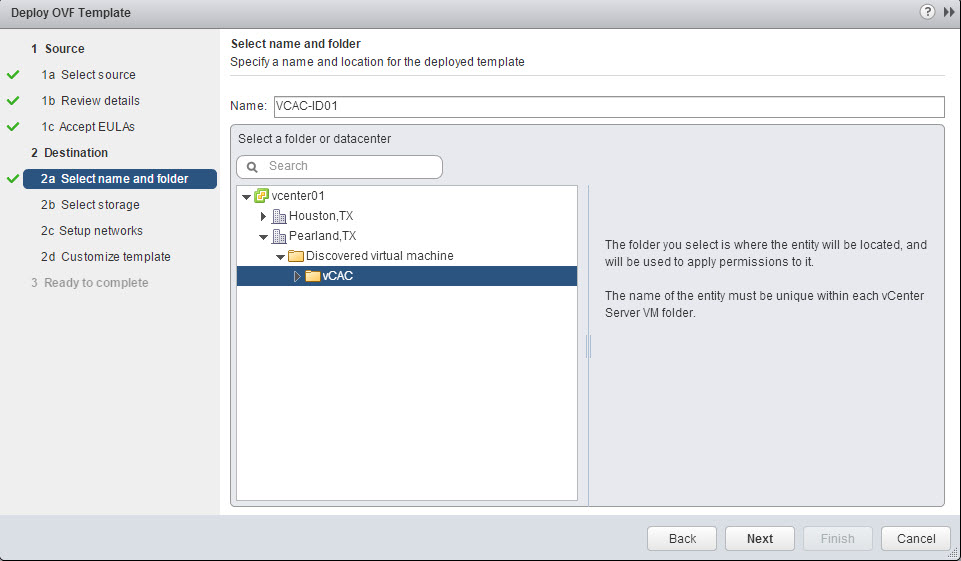
- Provide the identity appliance VM a name (FQDN) and location for deployment such as a datacenter or folder. Click Next.

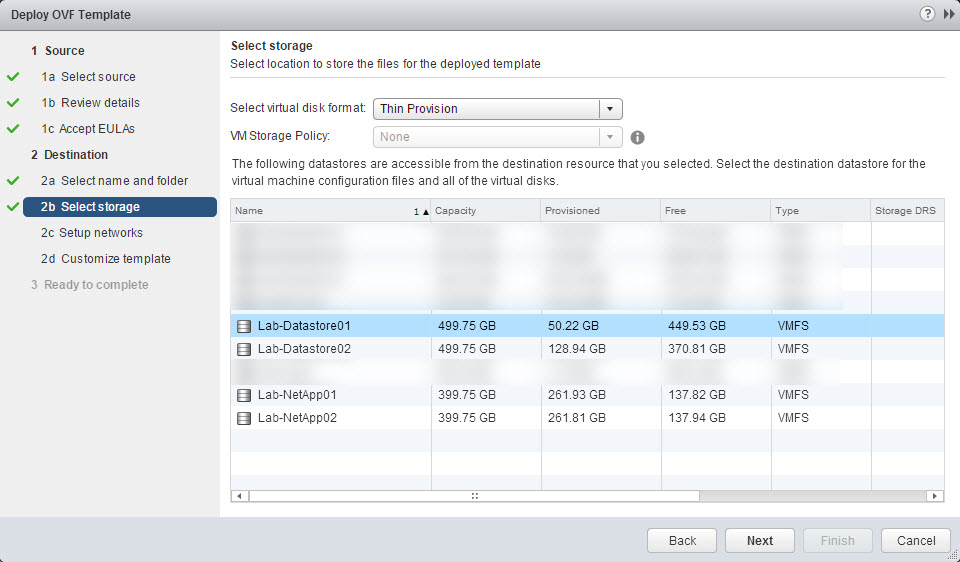
- Select the disk format, VM storage policy (if configured) and datastore for deployment. Click Next. Note: Before you click next verify the disk format is the one you selected, I have seen it change after selecting the datastore in the vSphere Web Client.

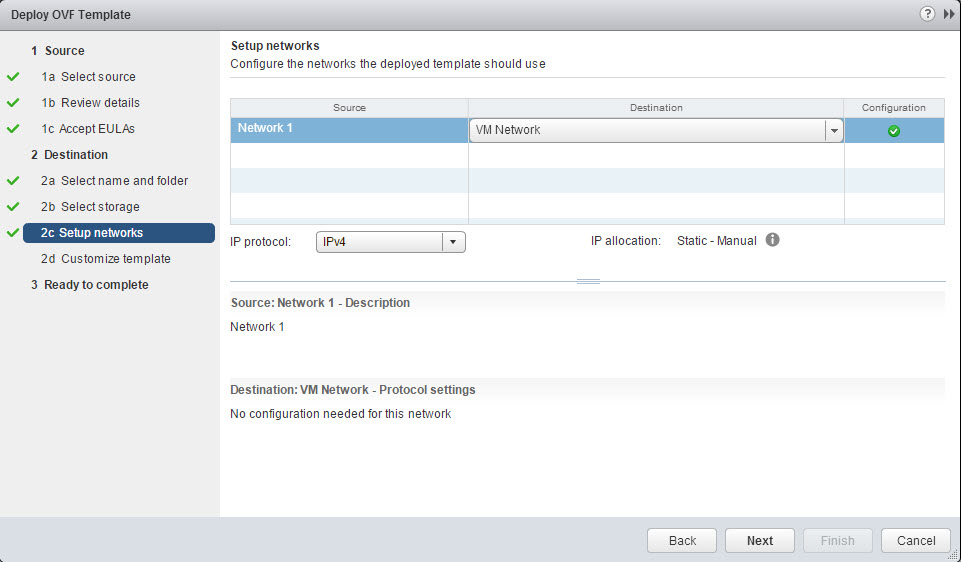
- Setup Network by providing the destination (portgroup) and IP protocol, click Next.
- Customize template by providing the properties values under the Application & Network Properties sections. Click Next. Note: Network information can be change from the command line, this comes in handy for troubleshooting.

- Review the VM configuration settings, auto power on after deployment is an option here or it can be done manually. If all checks out click Finish.

- Power On the Identity Appliance if it was not done in the previous step.
- Verify that FQDN / IP can be resolved successfully on the network.


*Command Line Network Settings*
- Open the identity appliance console or use SSH (if enabled).
- Log in in using the credentials supplied during the appliance deployment.
- Type “/opt/vmware/share/vami/vami_config_net”

- Verify the current configuration by selecting “option 0”.
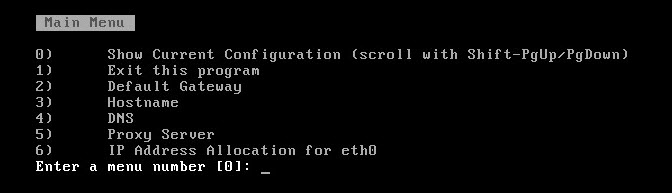
- Correct or add any needed configuration, exit when done using option 1. Note: I would recommend restarting the appliance, if any changes were made and verify the FQDN / IP can be resolved successfully.


Configuring the Identity Appliance
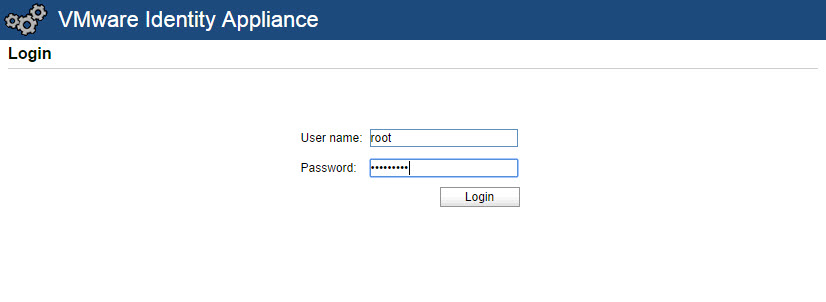
- Using a web browser navigate to the Identity Appliance management console “https://FQDN:5480”.

- Log in as root and the password specified during the deployment (step 11 above).

- Select Admin tab –> Time Settings.
- Select an option (Host time or time server) from the Time Sync Mode menu and save settings.
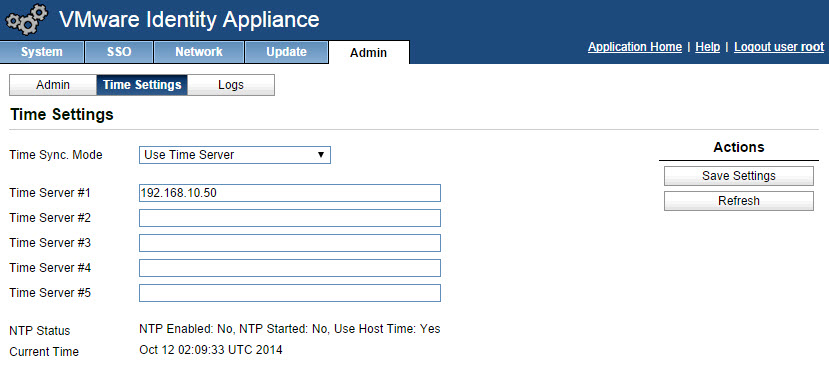
- Refresh and verify the time settings are correct.
- Select System tab –> Time Zone, change the system time zone. Click save settings. Note: Verify time settings are correct between the time source and the identity appliance.

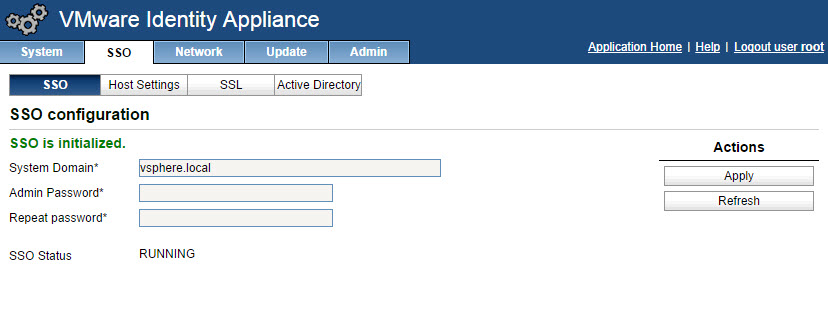
- Select SSO tab –> SSO, type the password that will be assigned to the [email protected] account. Click Apply and wait patiently.

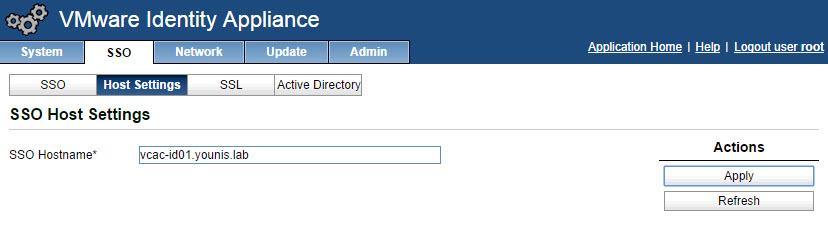
- Click the Host Settings tab, verify that the SSO Hostname does not include the SSO port:7444 (This was needed in vCAC 6.0 but is now set by default). Click Apply.

- Select the SSL tab, you have the option of importing or generating a certificate. Common Name, which is the FQDN of the identity appliance should already be filled in. Enter the name of the organization & organizational unit.
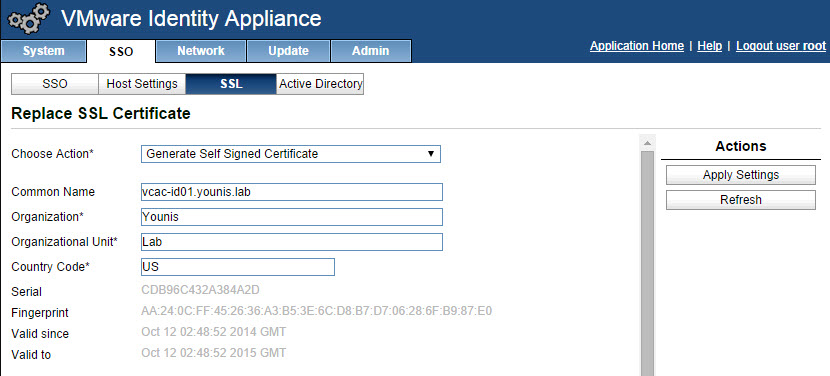
- Click apply settings.
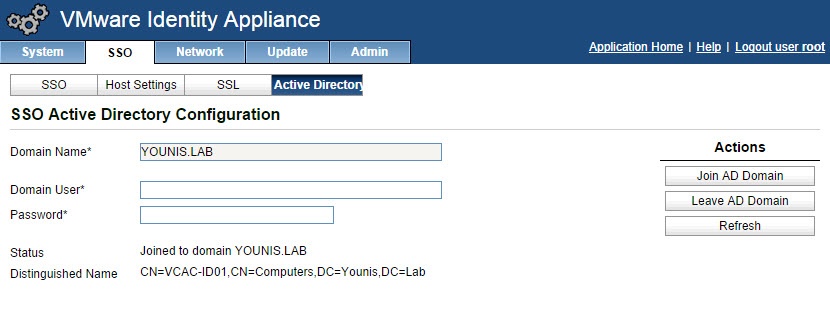
- Select the Active Directory tab, enter the name of your Active Directory domain in Domain name as well as the domain administrator account. Click Join domain.
- Verify that the SSH settings are correct from the Admin tab –> Admin. When SSH service enabled is selected, SSH is enabled for all but the root user. Select or uncheck Administrator SSH login enabled to enable or disable SSH login for the root user.

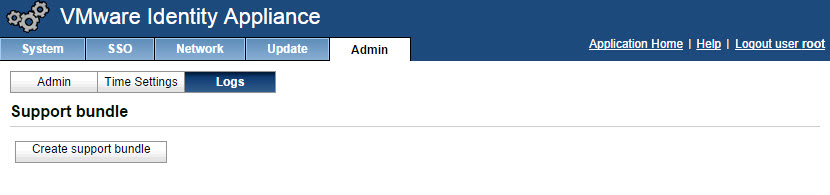
- The identity appliance logs can be downloaded from within the appliance by going to the Admin tab –> Logs then click Create support bundle. The log bundle creation process starts and the browser refreshes every 10 seconds until ready to download.


And with that, our identity appliance is ready to go. With the identity appliance ready, we can prepare for the next steps. Stay tuned and we will bring you more information on how to protect and backup your identity appliance.