vRealize Automation 6.1 (formally vCAC) – vRA Appliance Deployment & Configuration
At this point we have deployed & configured SSO, of course with HA and backups in mind. The next piece is the vRealize Automation appliance (vRA). The vRA appliance provides cloud management & a self-service portal for vRA. We are now going walk through the deployment and configuration of the appliance.
Prerequisites
- DNS (forward / reverse) entry.
- Network Time Protocol (NTP).
- 2 vCPU / 8 GB of RAM / 30 GB of storage.
- [email protected] account (SSO host).
Database
The vRA appliance uses Postgres, but you have options in its placement:
Option 1: Use the initial vPostgres that is created on the first vRA appliance.
Option 2: Install Postgres on a separate server.
Option 3: Install Postgres on several servers to establish HA.
Option 4: Configure vRA Appliance as a standalone Postgres database.
To find out more about the supported databases for the vRA appliance, check out the vCloud Automation Center Support Matrix.
Ports Required for vRA Appliance
The vRA Install & Configure document provides the required ports for the vRA appliance.
Deploying the vRA Appliance
Note : deployment of OVA done from the vSphere Web Client.
- Log in the vSphere Web Client with an account that has administrator rights.
- Select Hosts and Clusters.
- Select an inventory object such datacenter, cluster, host or resource pool.
- Right Click –> Deploy OVF Template or use Actions –> Deploy OVF Template.
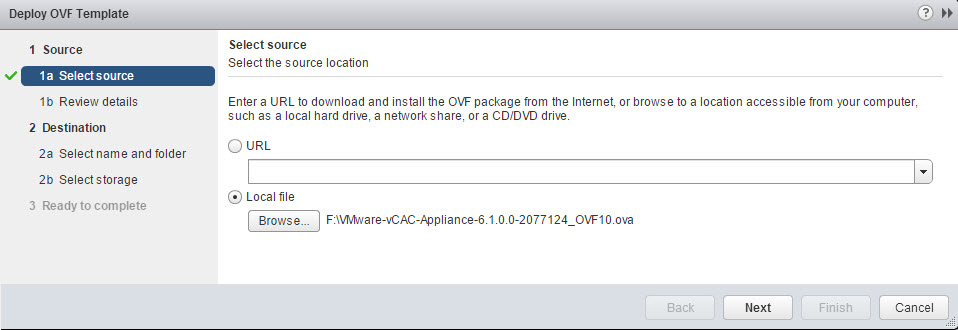
- Select Source location by browsing to the Identity Appliance file with either an extension of “.OVA “or “.OVF “and click Open. Click Next.

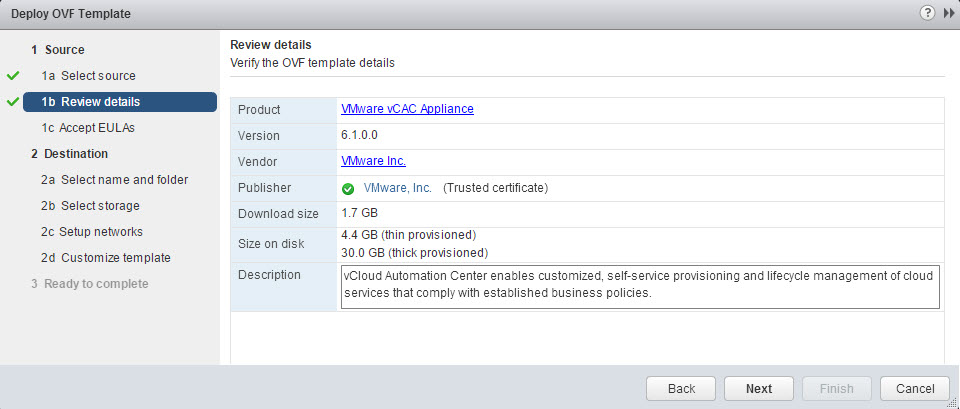
- Click Next on the Review details screen.

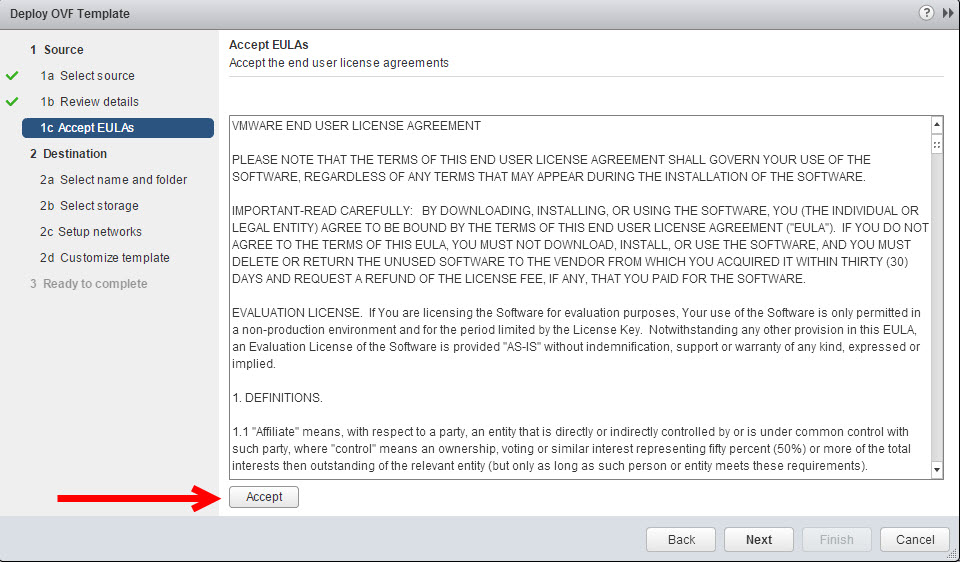
- Accept the EULA and click Next.
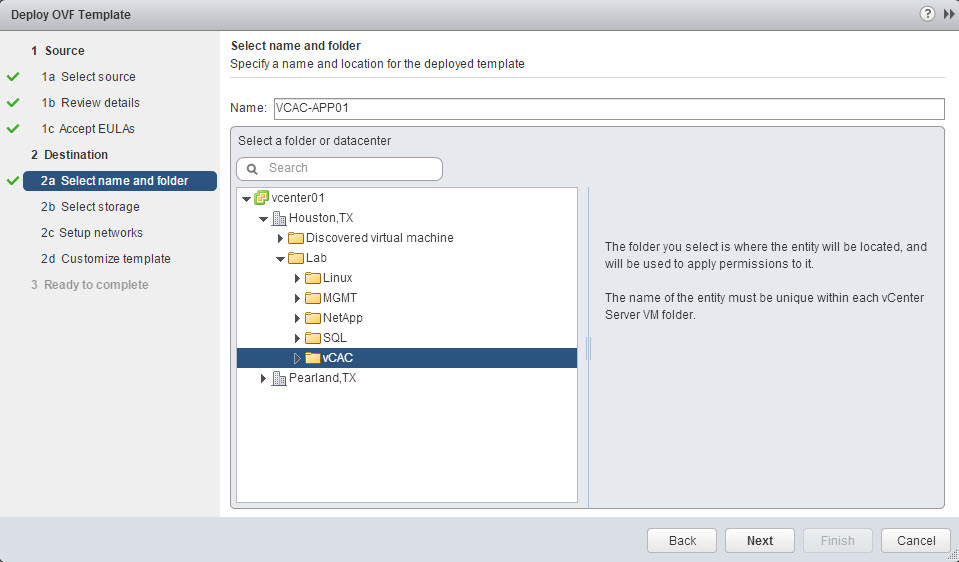
- Provide the identity appliance VM a name (FQDN) and location for deployment such as a datacenter or folder. Click Next.
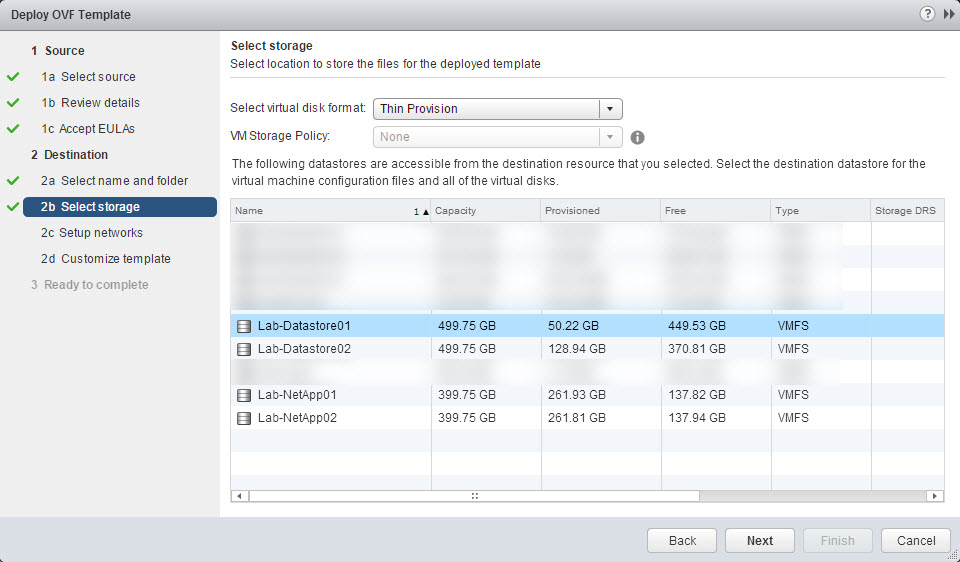
- Select the disk format, VM storage policy (if configured) and datastore for deployment. Click Next.
Note: Before you click next verify the disk format is the one you selected, I have seen it change (refresh) after selecting the datastore in the vSphere Web Client.

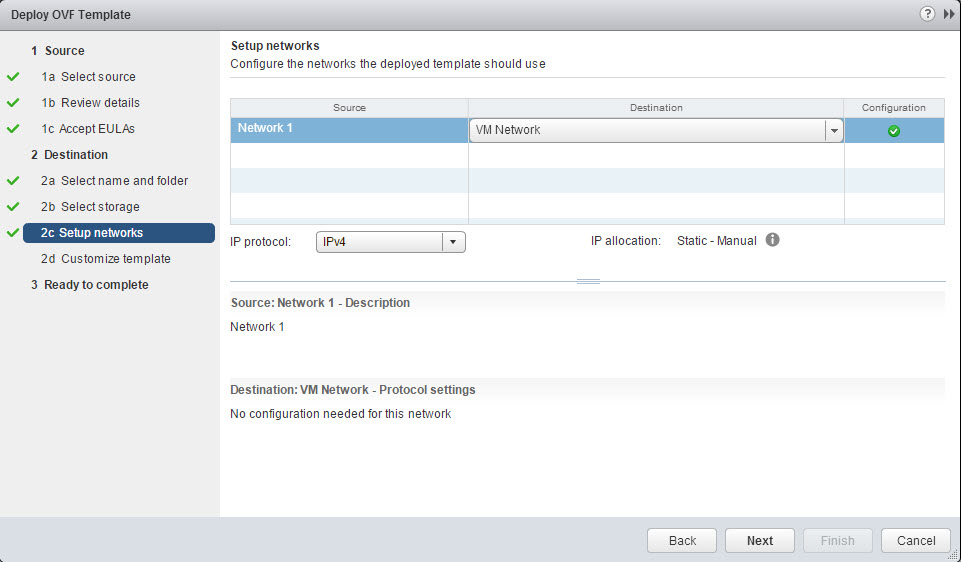
- Setup Network by providing the destination (portgroup) and IP protocol, click Next.
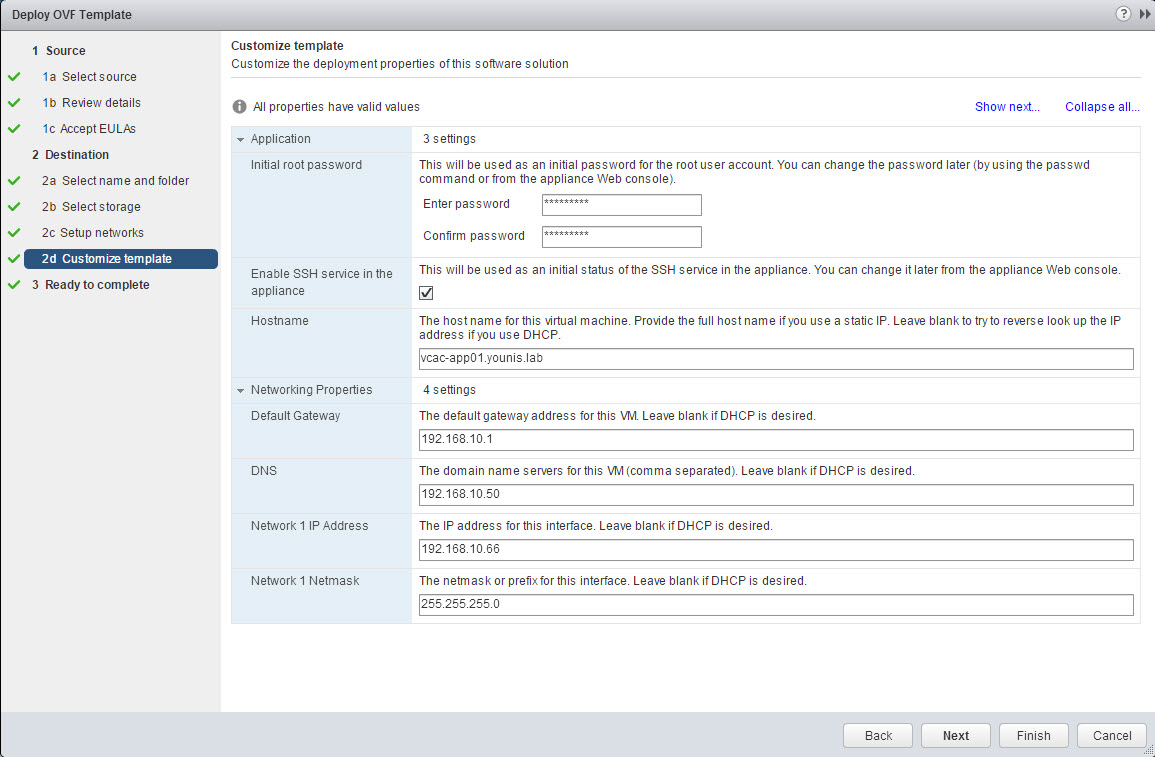
- Customize template by providing the properties values under the Application & Network Properties sections. Click Next.
Note: Network information can be change from the command line, this comes in handy for troubleshooting.
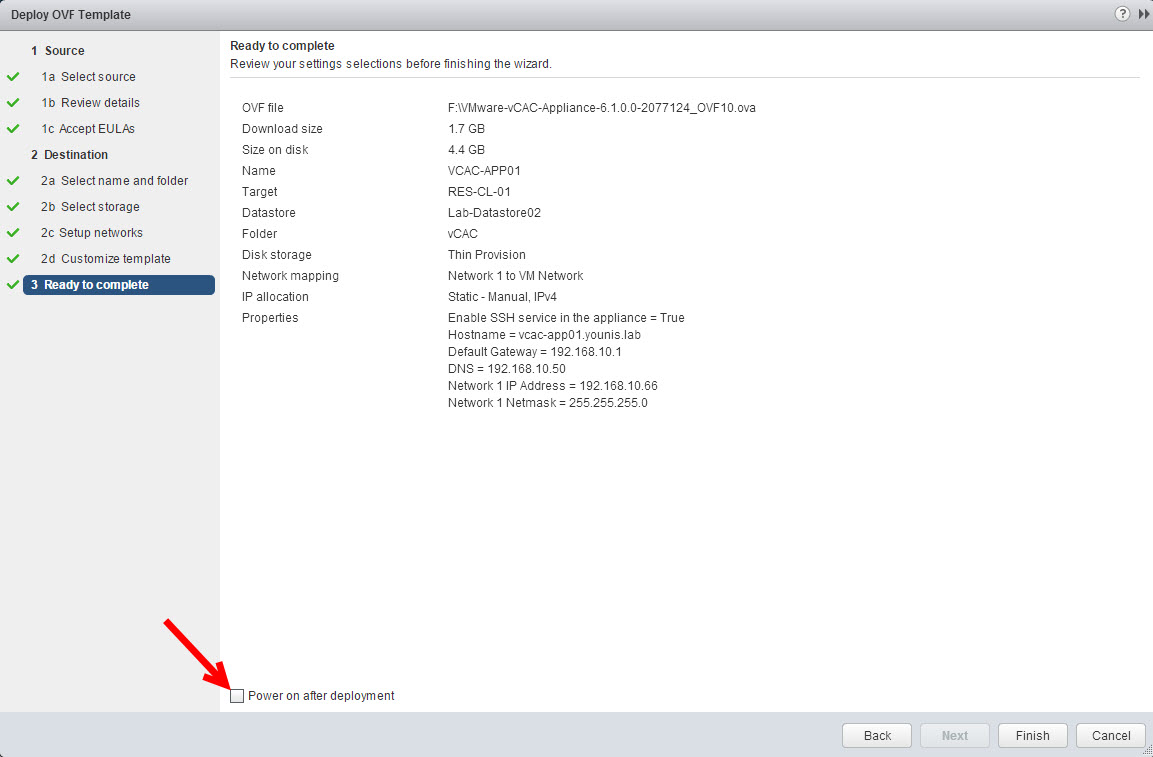
- Review the VM configuration settings, auto power on after deployment is an option here or it can be done manually. If all checks out click Finish.
- Power On the Identity Appliance if it was not done in the previous step.
- Verify that FQDN / IP can be resolved successfully on the network.


*Command Line Network Settings*
To verify, change or troubleshoot any network settings prior to vRA appliance configuration do the following
- Open the vRA appliance console or use SSH (if enabled).
- Log in in using the credentials supplied during the appliance deployment.
- Type “/opt/vmware/share/vami/vami_config_net“
- Verify the current configuration by selecting “option 0”.
- Correct or add any needed configuration, exit when done using option 1.
Note: I recommend restarting the appliance, if any changes were made and verify the FQDN / IP can be resolved successfully.
Configuring the vRA Appliance
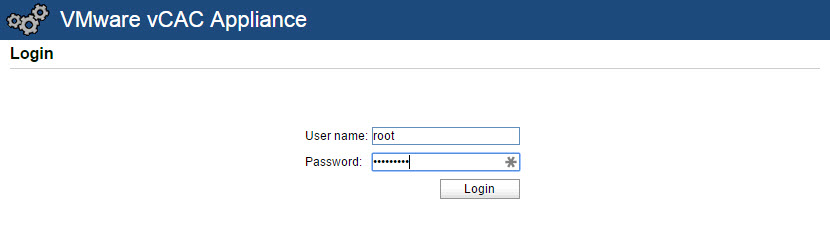
- Using a web browser navigate to the vRA Appliance management console “https://FQDN:5480”.

- Log in as root and the password specified during the deployment (step 11 above).
- Select Admin tab –> Time Settings.
- Select an option (Host time or time server) from the Time Sync Mode menu and save settings.

- Refresh and verify the time settings are correct.
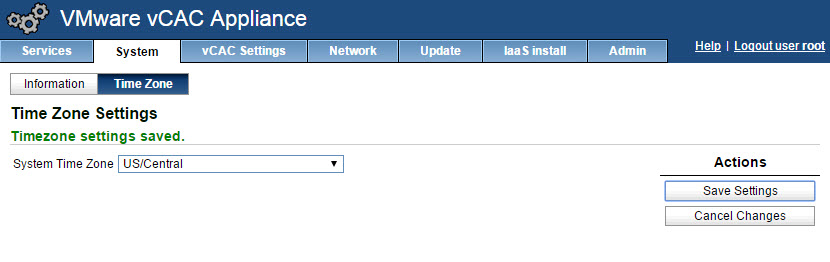
- Select System tab –> Time Zone, change the system time zone. Click save settings. Note: Verify time settings are correct between the time source and the vRA appliance.

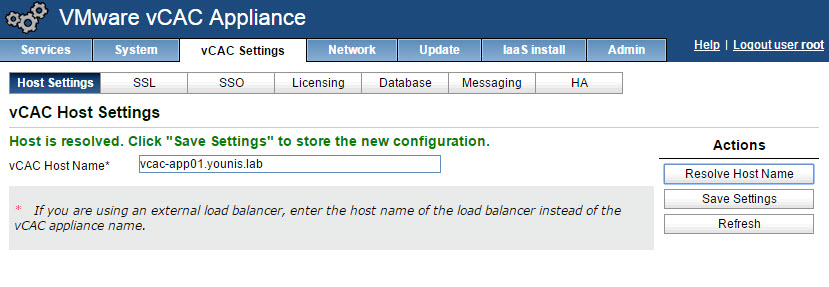
- Select vCAC Settings tab –> Host Setting, click Resolve Host Name which will display the current name of the appliance. If correct, click Save Settings. Note: DNS is key here, if vRA appliance can not resolve, check both forward and reverse DNS settings. Also if using a load balancer enter the FQDN of the load balancer for vCAC Host Name.

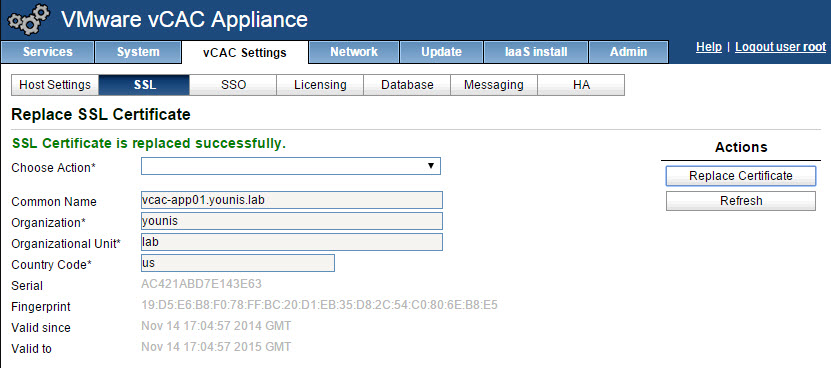
- Click SSL and select the certificate type from the drop down menu and fill in the required fields:
- Common Name = the FQDN of the VMware vCAC Server for the Common Name.
- Organization = Company
- Organizational Unit = Department / Location
- Two Letter Country Code
- Click Replace Certificate.

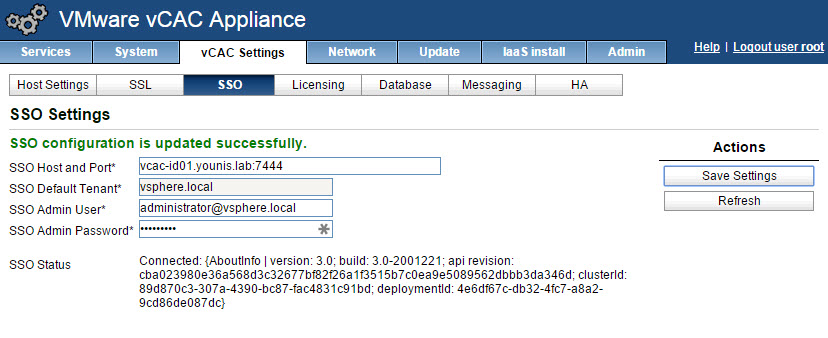
- Click SSO and fill in the required fields:
- SSO host name and port = FQDN of SSO host:7444
- SSO Default Tenant = vsphere.local (already added)
- SSO Admin = [email protected]
- SSO Admin password = Password set in SSO host for Admin
- Click Save Settings and wait for SSO the update SSO status.

- Verify the certificate.
- Click Licensing, enter a valid license key and click Submit.
- Click Database, if planning on using external Postgres database.
- Confirm all services have started from the Services tab.
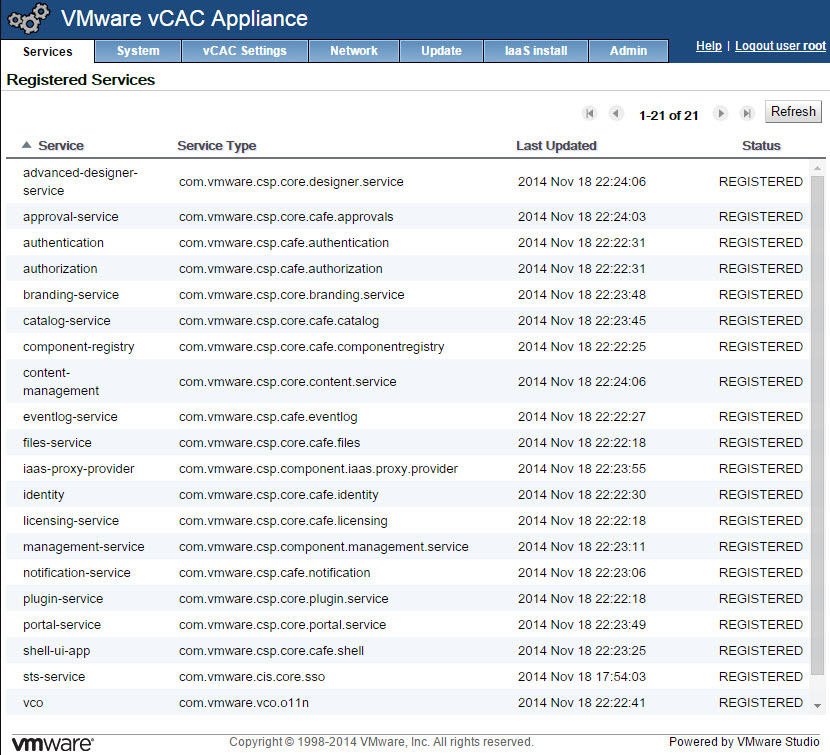
Note: To monitor service startup run the following command: tail -f /var/log/vcac/catalina.out - Validate access to the vRA console.
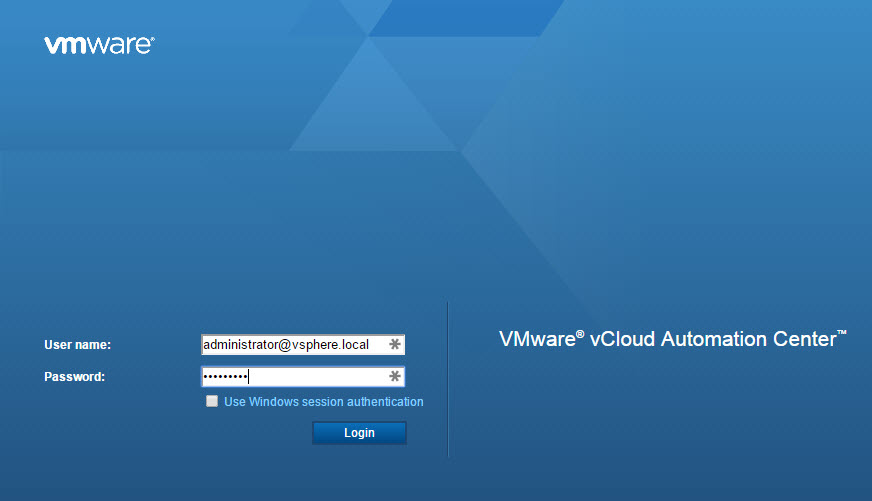
- Open a browser and enter the https://FQDN of vRA appliance/vcac
- Accept the vRA certificate & SSO certificate
- Log in using [email protected] account
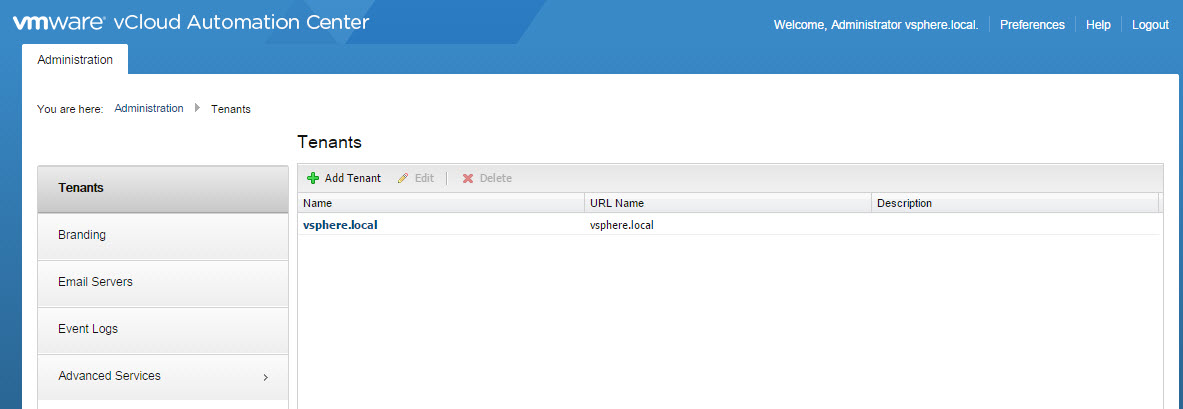
- Confirm the default vsphere.local tenant is present.


There you have it we now have SSO & vRA appliances setup, next up IaaS. One honorable mention for the vRA appliance is that is does have built HA, which will be covered in a future post.