vRealize Automation 6.1 (formally vCAC) – IaaS Database
Up to this point we had the convenience of deploying appliances for both SSO & vRA. The deployment of the Infrastructure as a Service (IaaS) requires Microsoft Windows & SQL. IaaS uses Microsoft SQL to maintain information about managed virtual machines and policies. Microsoft SQL can either be a remote server deployment or local with IaaS. So before we can setup IaaS we need to have SQL installed, let’s get started.
Requirements
Windows Server 2008 R2 / Server 2012:
- DNS (forward / reverse) entry.
- TCP / IP protocol enabled.
- Microsoft Distributed Transaction Coordinator Service (MSDTC) enabled.
- No windows Firewall between Database server (if deployed separately) & IaaS Server
- Microsoft SQL 2012 or 2014 / SQL Express (SQL Server Browser service must be running).
- SQL Service Account.
Required Ports
The vRA Install & Configure document provides the required ports for SQL / IaaS.
Database Options
The following are a few ways to consider for your SQL deployment:
- Deploy a remote SQL server with a blank database, allowing IaaS installer to do the configuration.
- Deploy a remote SQL server and using the database installation scripts for configuration.
- Install SQL local on IaaS server and use either of the above configuration methods.
- Install SQL local on IaaS server allowing IaaS installer to configure.
Note: Things to keep in mind for the Database options:
- Deployment method: minimal or distributed.
- Database high availability.
- Backup of Database.
Database Setup
- Launch the SQL Installer from within your windows machine.
- Select installation method of Stand-alone or Cluster. Since this is a lab deployment, I am using a stand-alone installation.
- SQL System Configuration Checker will determine if there are or will be issues with the install. If there are any issues, correct before proceeding otherwise click OK.

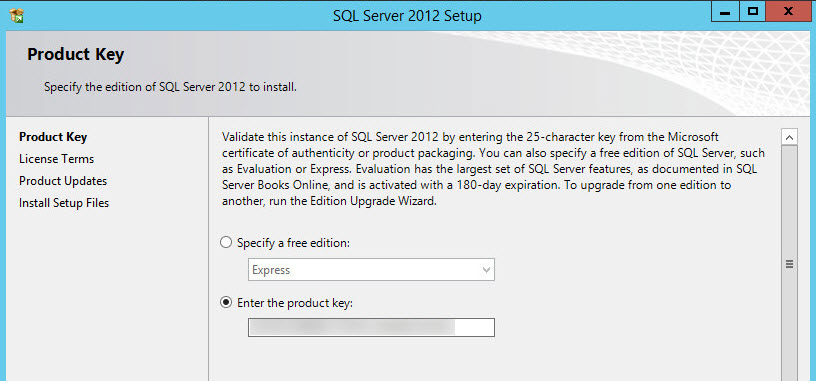
- Enter SQL product key or select a free edition such Express, click Next.
- Accept the EULA.
- Product Updates can either be installed now or later, for this deployment I have decided to skip the updates for a later time.
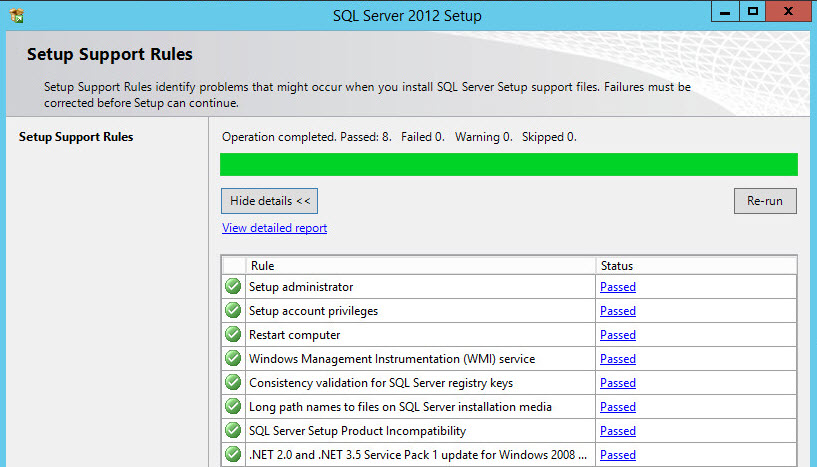
- SQL Setup Support Rules will verify all prerequisites are met.
Note: Make Windows Firewall is either disabled or allows the required ports. Also if working in an isolated environment ignore messages about internet access. - Select SQL Server Feature Installation.

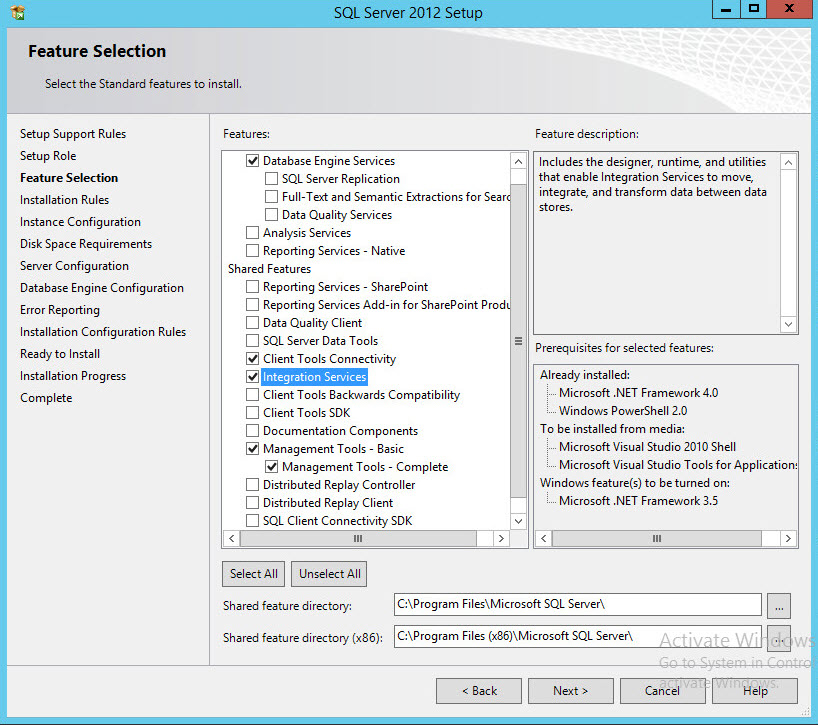
- Select the standard features to install, I selected the following to get started as well as kept the default install directories for my lab environment.
- Database Engine Services
- Client Tools Connectivity
- Integration Services
- Management Tools

Note: There may be other features that make sense in your database environment. - Verify all and click Next on Installation Rules.
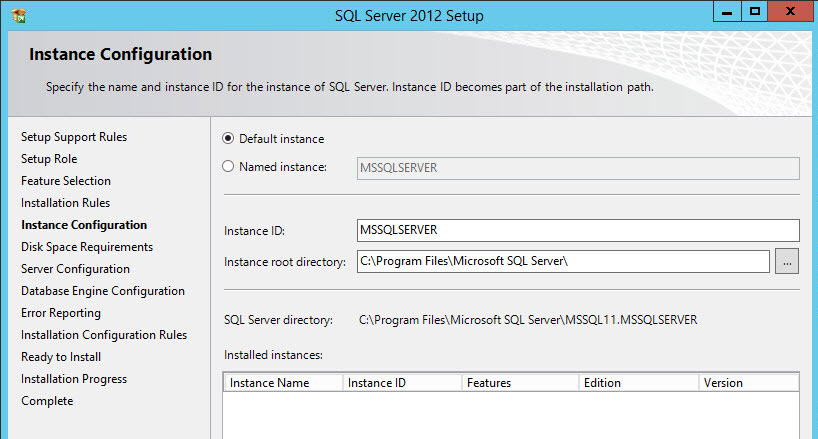
- Keep or change the SQL instance name and root directory, click Next.

- Disk Space Requirements validates enough space is available for the SQL install. Click Next.
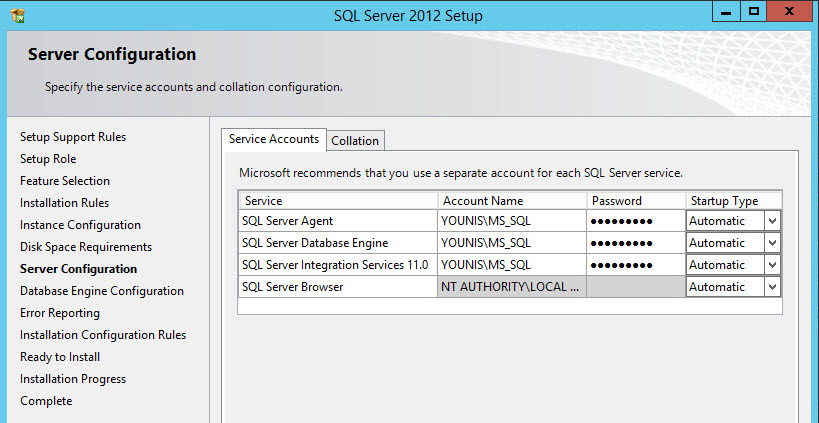
- Set the services on the Server Configuration to automatic. I have a SQL service account that will be used for the services.
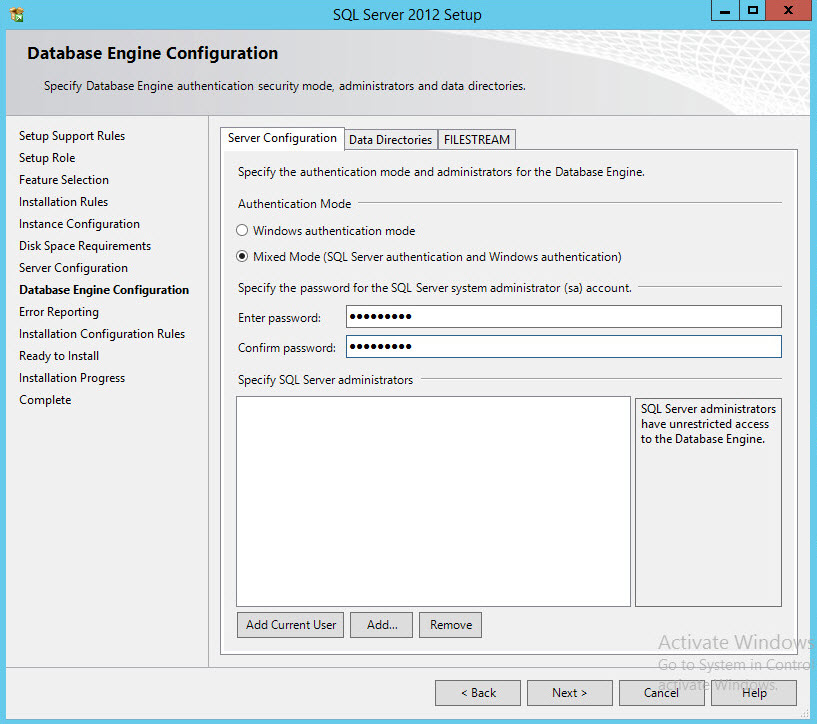
- Use either Windows or Mix Mode Authentication (can be changed after the setup). Things to keep in mind here:
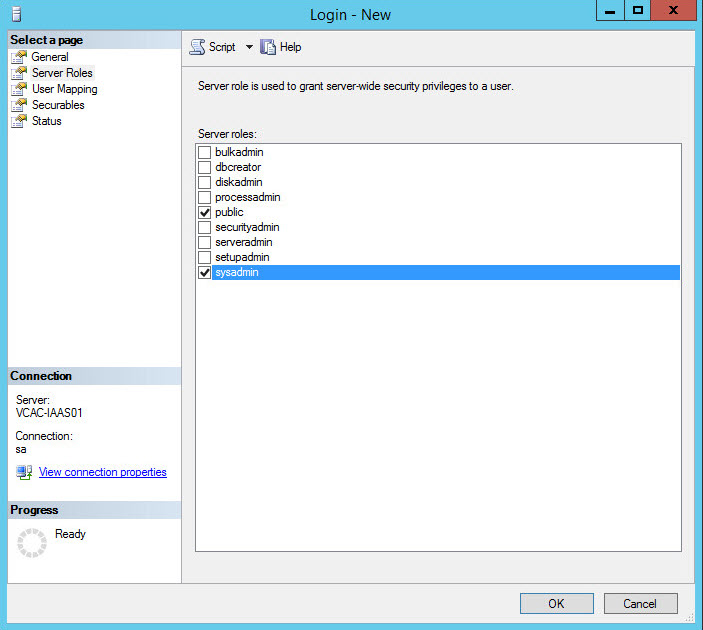
- If the IaaS installer is used to create the database with Windows authentication, the installer credentials need the sysadmin role.
- If the IaaS installer is used to create the database not using Windows authentication, then SQL credentials with sysadmin role are required.
- If the IaaS installer is used to populate a pre-created database require either windows or SQL credentials with db_owner privileges.
- Click Next on error reporting, unless you really want to send information to Microsoft.
- Start the SQL install and wait for the magic to happen!
- Rejoice to the successful completion of the SQL install.


Database Settings -MSDTC
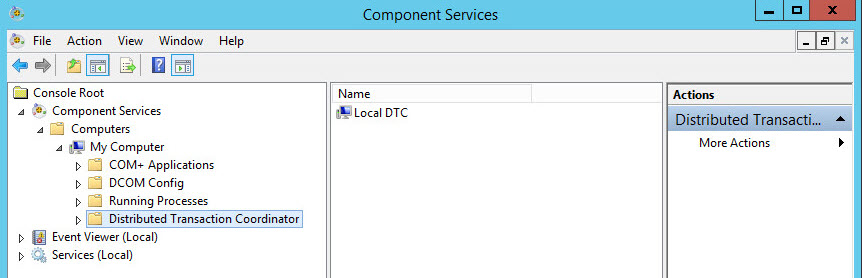
- Open Component Services, Start –> run –> dcomcnfg or Start –> Administrative Tools –> Component Services.
- Expand Component Services –> Computers –> My Computer –> Distributed Transaction Coordinator (MSDTC).

- Right click the Local DTC and select Properties.
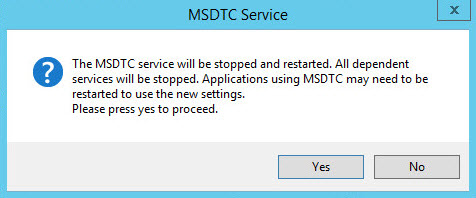
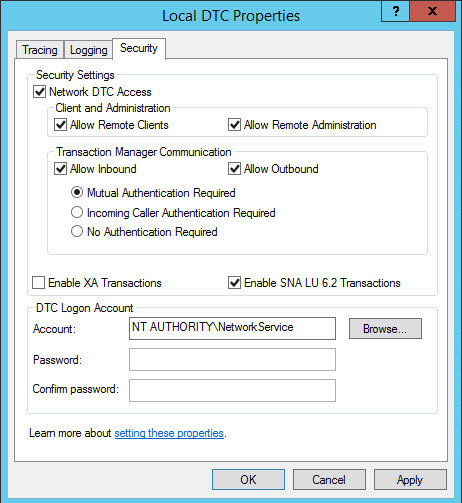
- Under the security tab check Network DTC Access, Allow Remote Clients and Allow Remote Administration.
Updated : also check Allow Inbound and Allow Outbound under Transaction Manager Communication.

- Click OK and allow the service to be restarted.

Database Settings – TCP/IP
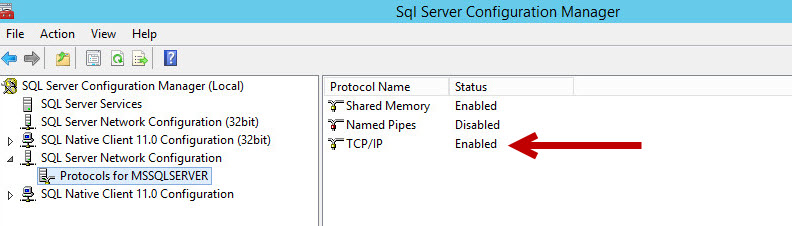
- Open SQL Server Configuration Manager.
- Expand SQL Server network Configuration and click Protocols for MSSQLSERVER.
- Verify TCP/IP is enabled.

Database Credentials
Make sure to assign the account that will be creating the IaaS database the correct privileges. Sysadmin role unless the database is already pre-created then db_owner privileges will be needed.

Now that the SQL database is prepared, we can move forward with the IaaS install.