VMware Integrated OpenStack (VIO) SSO Error

 Like other VMware products, VIO leverages Single Sign On (SSO). Luckily, the SSO configuration with VIO is fairly simple. When used with vSphere 5.5 it requires IP or FQDN of your vSphere SSO along with port 7444. With vSphere 6.0 you don’t have to use a port, it’s that easy. I ran into this error while installing VIO. Here is the process I went through.

Troubleshooting
Sometimes the first intuition when dealing with a lab or new deployment is uninstall. That may seem like a quick solution, but not always the best. What if the reinstall provides the same results, then you’re back to square one. I wanted to troubleshoot and confirm my setup was correct. This validation would help in case I ran into this issue again.
- Checked DNS entries are correct.
- Necessary firewall ports are open. Check the VMware’s documentation for the required firewall ports.
- Verified network communication from vCenter SSO and VIO management-server. This was done by validating by IP and FQDN (forward and reverse lookup).
- Verify that you have used the correct syntax when adding your SSO during the VIO install.
- Of course the obvious, review the logs (installer.log).
After going through these troubleshooting steps and not finding anything, I decided to uninstall VIO and reinstall. Not only will you have to uninstall VIO but there is also some clean up required. This ensures that the VIO plugin is removed from the vSphere web client prior to re-installing.
Uninstalling VIO Correctly
- Shutdown the VIO vAPP and delete from disk.
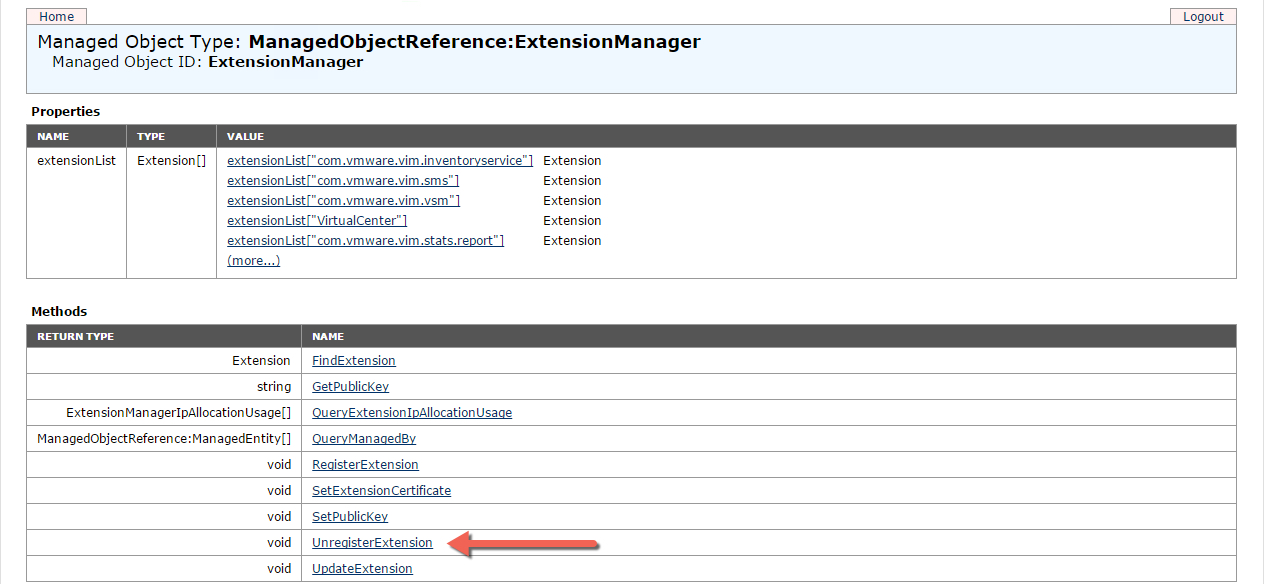
- The VIO plugin remains in vCenter until its unregistered, go to https://IP or FQDN of vCenter>/mob/?moid=ExtensionManger
Note: The Manage Object Browser (MOB), provides visibility to both ESXi and vCenter’s object runtime information via web browser. - Accept the untrusted cert, if not using self signed cert.
- If prompted to login, use the administrator account same as the vSphere web client, for example [email protected].

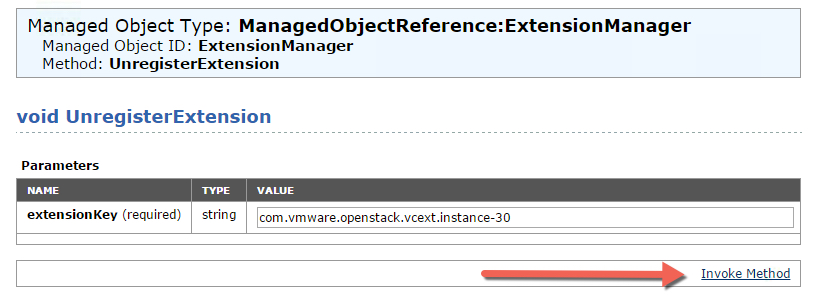
- Under the methods section click on Unregister Extension. A pop-up window will open for Unregister Extension.

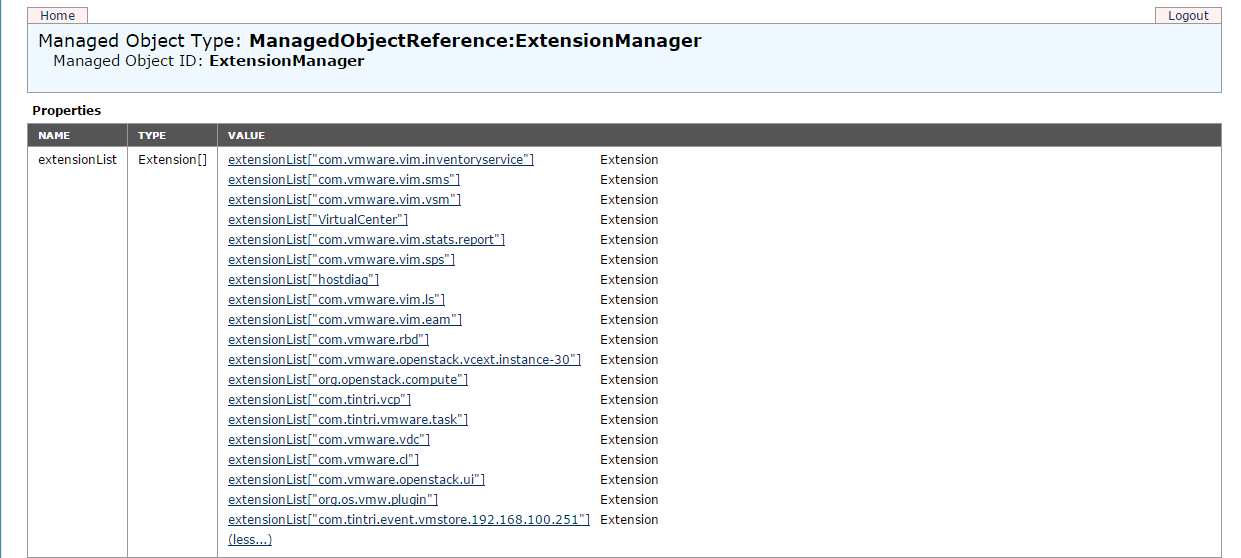
- Under the properties section expand out the values by clicking on more.
Before Expanding
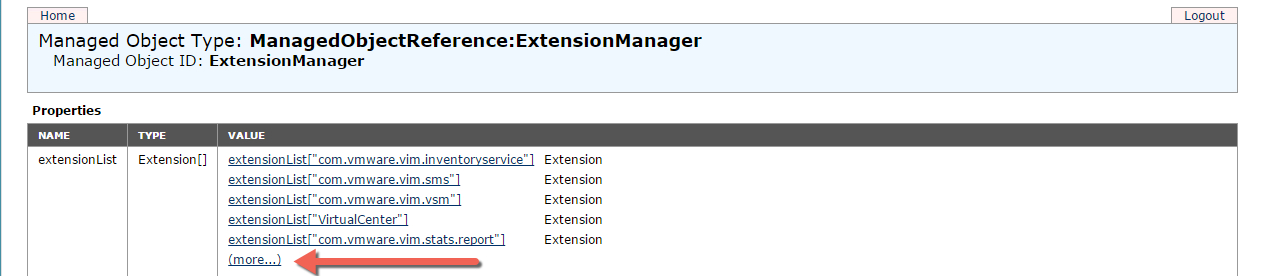
After Expanding

- Unregister OpenStack extensions which include the following:
com.vmware.openstack.vcext.instance-#
org.openstack.compute
com.vmware.openstack.ui
org.os.vmw.plugin
Note: There could be several vcext.instances depending on how many times you tried to install VIO without removing the plugin.
Before Unregister Extension
After Unregister Extension
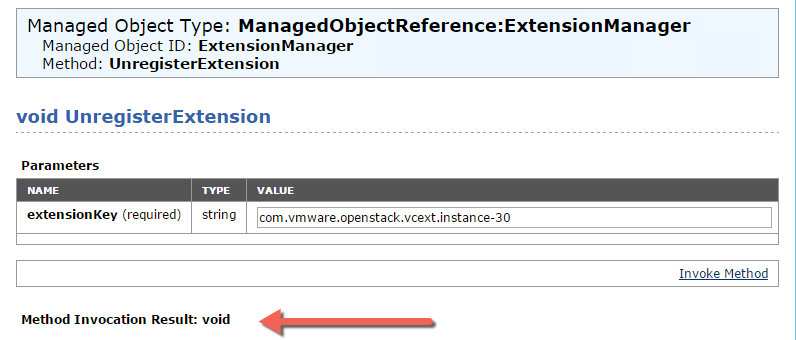
- Once the extension is removed, refresh the MOB and the extension is removed. Rinse and repeat until all the OpenStack extensions have been removed from the MOB.
- Logout and back in the vSphere web client and the VIO plugin should no longer be available.


As you can see removing the vApp is only part of the process. Redeploying without properly removing the VIO plugin from the vSphere web client will result in the same error or potentially others. This method can be used to uninstall other plugins from the vSphere web client as well. Make sure you know which extensions to remove or else you could cause more harm than good. After going through this process I was able to re-install VIO without any issues.