vCenter Server Appliance (VCSA) 6.5 Installer Improvements
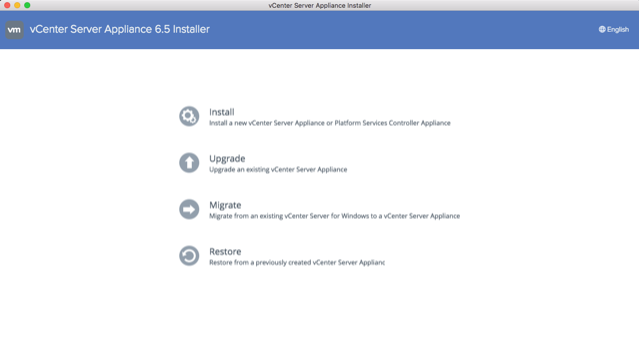
The vCenter Server Appliance (VCSA) 6.5 has significant new features and improvements mentioned here. One area of notice is the installer, which in this release not only has a new look and feel but other improvements. These improvements are not only visible from the ISO, but also during the deployment. The end result is a better experience throughout the VCSA deployment process. Let’s jump in and take a closer look.
Pre-Install
The VCSA installer is now browser agnostic, which makes it more portable. Along those lines, the Client Integration Plugin (CIP) is no longer needed. CIP provided browser functions such as importing an OVF/ OVA which are now native. Other CIP provided functions that are now native include:
- Exporting VM or vApp as an OVF / OVA
- Deploying OVF / OVA from a local file system or URL
- Exporting and importing from Content Library to the local file system
- Downloading and uploading files to and from a datastore
- Connecting remote devices to a VM (CD-ROM, USB, etc.)
You may have noticed a couple of items missing from this list. Windows Authentication (SSPI) and Smart Card Authentication will still require a plugin. The Enhanced Authentication Plugin (EAP) will be available to enable these two functions.

A couple of things to mention about EAP:
- EAP will require a Windows operating system to download and install.
- A CipMsgProxyService is running after the EAP is installed.

Finally, the installer now supports use on macOS, Linux, and Windows. As always check the documentation to see supported OS versions. The installer will have the following minimum hardware configuration requirements for best performance:
[table id=9 /]
Deployment
Up to this point the discussion has been about the exterior installer improvements. Now let’s shift gears and discuss the hotness inside. There is now the flexibility to move backward in the navigation pane on the left side. Moving forward still requires clicking next in the designated section as usual. Don’t worry any information entered will still be available when you move between screens.

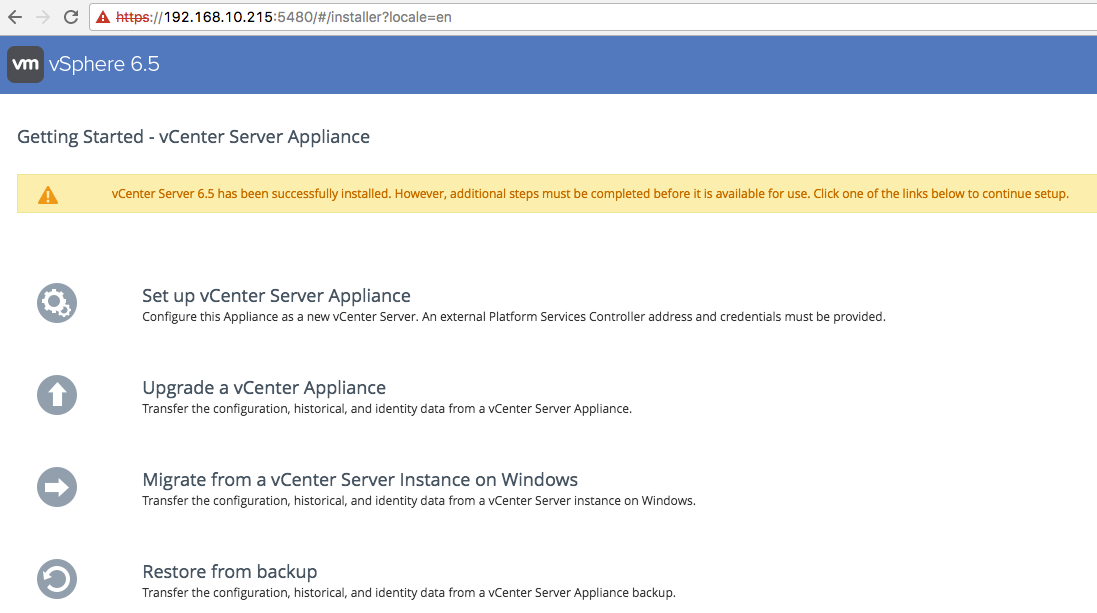
Previously the VCSA installer only had one stage. This meant any issues that occurred during the deployment would require a complete re-deploy. Of course, this was a pain when starting a deployment and walking away only to come back and find it had failed. Those days are now in the past, the VCSA 6.5 installer is now a two stage deployment process. Stage 1 deploys the OVA, configures basic networking, and starts the VAMI service. Stage 2 is the setup / configuration of the VCSA. After Stage 1 is complete you are presented with two options, to either close the installer or continue on to Stage 2. This ability to close the installer between stages provides a few possibilities. The first is the opportunity to take a snapshot between stages, in case any mistakes occur during Stage 2. Just for the record, taking snapshots between stages while handy is not supported. Second, if you have pressing business to take care of, you can always come back and finish the VCSA configuration later through the VAMI. The VAMI provides the option to continue the setup of the VCSA, starting at Stage2.
One benefit to having a two stage deployment is better validation checks. The installer does validation checks at each stage, and in the case of any errors, there is now better error messaging. If there are errors, the installer logs are presented for troubleshooting. Depending on the issue presented there is the possibility of correcting it and proceeding with the installation.

Along with the previous deployment sizes of Tiny-Large, this release introduces X-Large. The new X-Large size allows up to 2K hosts and 35K powered on VMs. The new size requires 24 vCPUs, 48GB of RAM, and 980GB of storage. Also, a new addition to the deployment size is the ability to increase the VCSA storage size. Two storage increase options are available to us Large and X-Large. Select one of these options if you want to increase the initial VCSA deployment size for SEAT data. SEAT stands for Stats, Events, Alarms, and Tasks. Changing the VCSA deployment size and storage is possible after deployment as well. A few things to note that have changed from the VCSA 6.0 sizes from the previously mentioned include:
- External Platform Services Controller size is now 2 vCPU & 4GB of RAM.
- Embedded deployments (VCSA and PSC on the same VM) are now 2 vCPU and 10GB of RAM
[table id=8 /]
The VCSA installer has improved significantly from the previous 6.0 release. Shout out to the vCenter team for listening to its customers and providing a better user experience.