
This blog post allows me to bring two of my favorite things together. I have been a fan of the vCenter Server Appliance (VCSA) since its release. With continuous improvements, it’s evident that VCSA is the future. My other favorite thing is Ravello. They have given us the ability to have a home lab in the cloud, extend our current labs, and share blueprints. Two great products, that up to this point were not able to be used together. This is like having peanut butter on one slice and jelly on the other, and eating them individually.

We all know the awesomeness that happens when you combine the two slices. This is the same effect when bringing together the VCSA and Ravello. This wasn’t an easy task, consisting of several attempts and asking lots of questions, but it’s now doable!
The Problem
With the VCSA 6.0 VMware changed the deployment format from OVA/OVF to ISO. This introduces some problems when trying to directly import on Ravello. Some of the problems are:
- ISOs are a supported format on Ravello, but there’s no way to access the VCSA files natively.
- Currently there’s no support for uploading an OVA. VCSA OVA format (vmware-vcsa) located on ISO.
- Deploying a VCSA to a ESXi host, Workstation, Fusion, or vSphere environment and export to OVF. This results in the following error:
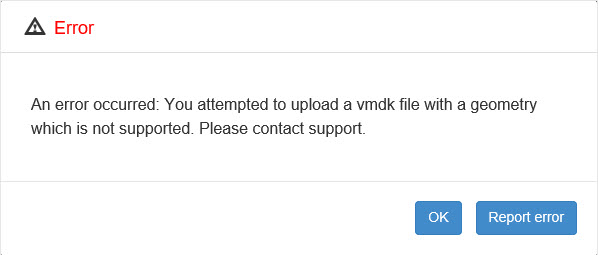
The problem is the number of disks. The VCSA requires 11 disks, while Ravello currently supports a maximum of 7 disks per HBA on their end.
Fear not, there’s a way to get the VCSA on Ravello!
Considerations
There are a few things you should consider before starting this process.
- Naming – When deploying your VCSA once you provide it a FQDN or IP address it can’t be changed, at least in a supported manner. The PNID is tied to the FQDN or IP address and is referenced in many places (KB2130599 & KB2124422). The only option is to redeploy.
- DNS, DNS, DNS – Make sure forward and reverse DNS is configured.
- NTP – Configuring time is important for troubleshooting, configuration management, and security.
Note: I deployed my VCSA based on my home lab domain, using a FQDN. I knew that I would be building the same domain in Ravello. If you aren’t sure or not planning on doing the same, your best bet is to deploy using an IP address.
VCSA Prep Work
- Deploy the VCSA to an ESXi host, vCenter Server (6.0 U1), Workstation, Fusion, or vSphere environment. My example is based on deploying to my vSphere lab.
- Once your VCSA has been deployed, power it off.
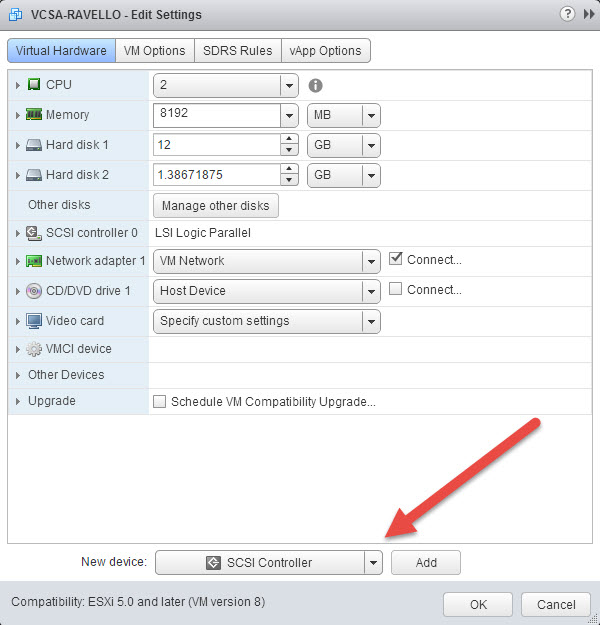
- Add a second SCSI controller to the VCSA.
![]()
- Move Hard disks 8-11 to the new SCSI controller (SCSI controller 1) .[table id=6 /]
- Edit the VCSA settings in the vSphere web client.
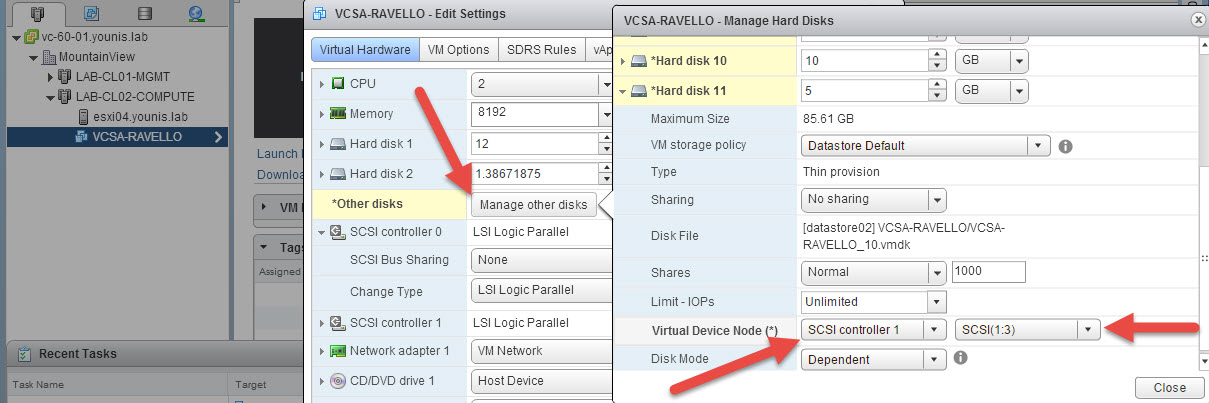
- Click Manage other disks, and expand the hard disk you’re making the change to.
- Change the Virtual Device Node to SCSI controller 1 and the next available SCSI Bus / Device number starting with 1:0.
![]()
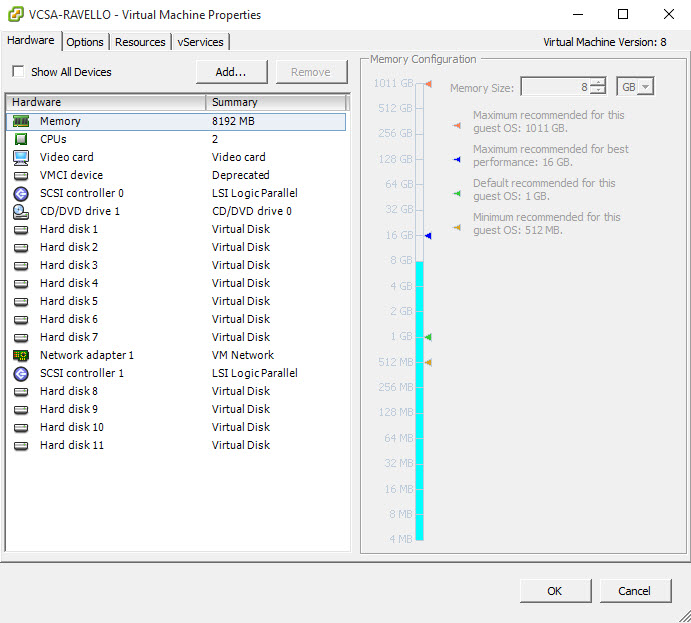
Here’s a logical view of the VCSA hard disks under their respected SCSI controller from the vSphere C# client.
![]()
Note: Ravello will automatically add a second HBA on their end to support the newly added SCSI controller. - Power on the VCSA, make sure that it’s still functional and you have access to the web client. Once that’s been verified power off the VCSA.
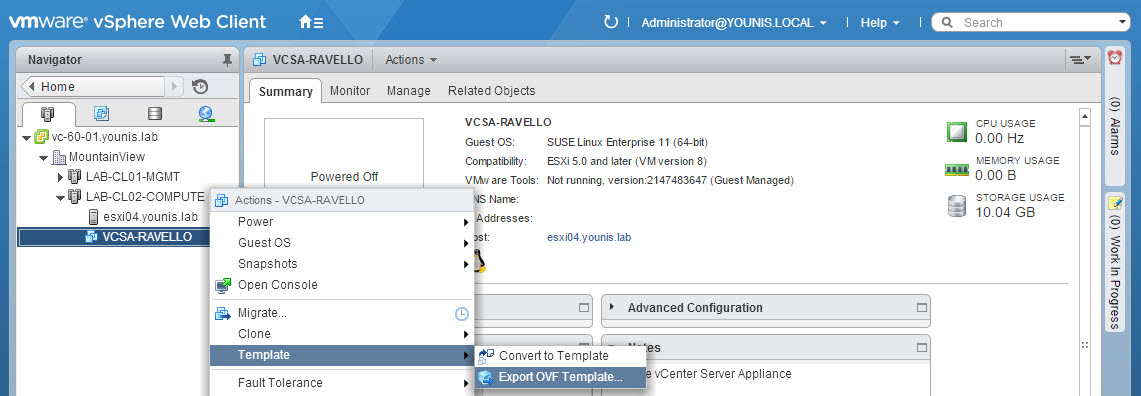
- Export the VCSA as a OVF.
![]()
- Select the export directory and verify format is OVF. Click OK.
![]()
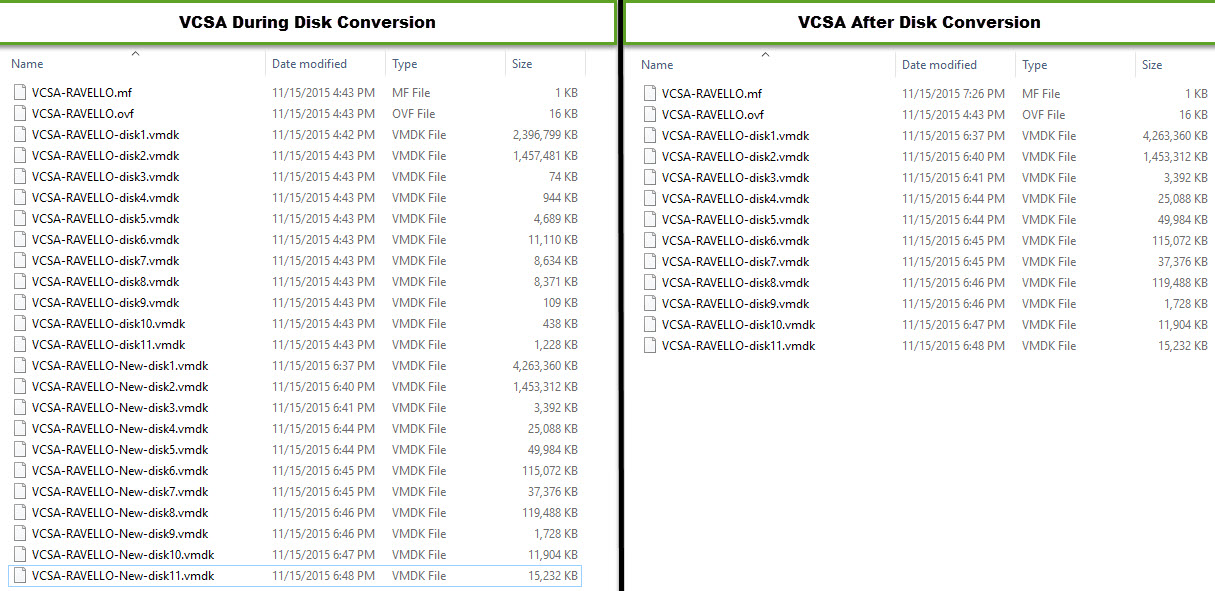
Convert stream-optimized VMDK disks to non-stream-optimized disks before uploading them to Ravello. Per the following Ravello KB article. Download and install QEMU for windows or Linux and run the following command: qemu-img convert -p -f vmdk -O vmdk “original vmdk file” “new vmdk file”
Note: This must be done for all 11 VCSA disks.
![]()
- Now there should be 22 VMDK disks, 11 original & 11 new. I recommend backing up the 11 original in case you need them at a later date. I created a backup directory and moved them there. Now rename the new VMDK disks to the original names.
Note: Another option is to create the new VMDK disks in a separate directory, this will save time with having to rename. You will have to copy the .mf and .ovf files over.
![]()
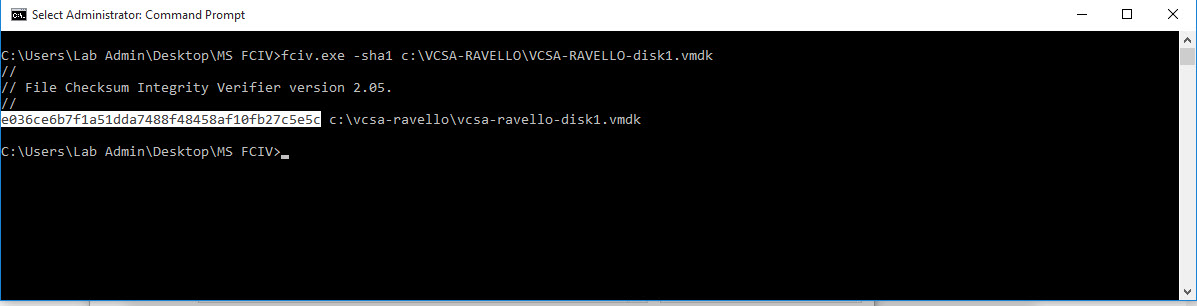
The manifest file (.mf) stores the SHA1 hases for each disk and needs to be updated. Microsoft has a free tool called File Checksum Integrity Verifier (FCIV).fciv.exe -sha1 “path of the vmdk”
![]()
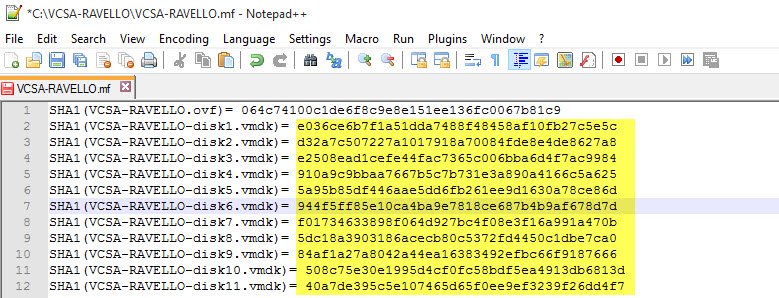
- Open the manifest file (.mf) with your favorite editor and replace each VMDK hash with the newly generated one.
![]()


Finally, done with the prep work and ready to start getting this bad boy on Ravello.
Importing VCSA on Ravello
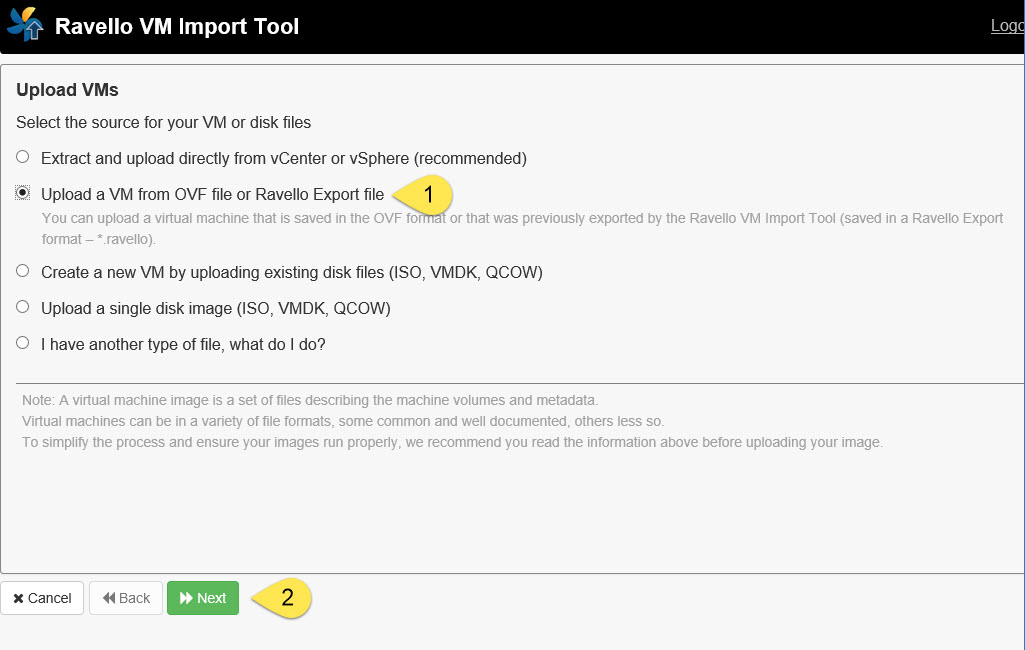
- Login the Ravello VM Import Tool and select Upload a VM from OVF file or Ravello Export file. Click Next.
![]()
- Navigate to the VCSA directory and select the OVF. Click Upload.
![]()
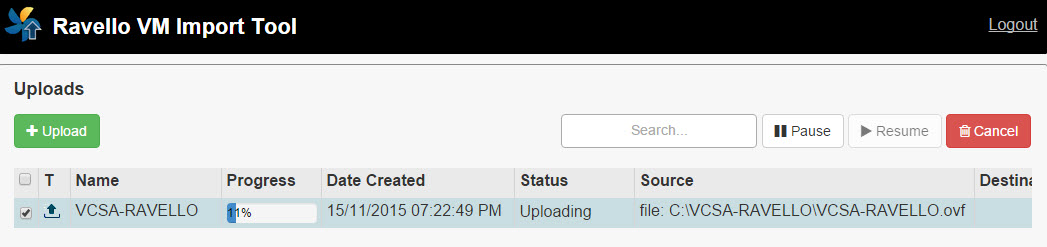
- Away we go! The upload process has started, sit back and relaxed you’ve earned it. Plus there’s nothing more to do until the upload is finished.
![]()

Ravello VCSA Configuration
- Login your Ravello account and create a new application. I created one called VCSA 🙂
- Prior to adding the VCSA to the newly created application we need to verify its configuration. Go to Library –> VM and select the VCSA that was just uploaded. One the right hand side click Edit & Verify VM.
![]()
- Select the System tab, here you can increase the number of CPUs or RAM. By default a tiny deployment starts with 2 CPUs and 8GB of RAM.
- Go to the Disk tab and verify that the VCSA hard disks are in order. If not place them in the correct number order using the arrows.
- Select the Network tab and add a static IP address, Network Mask, Gateway, and DNS.
- Go to the Services tab, add the following services
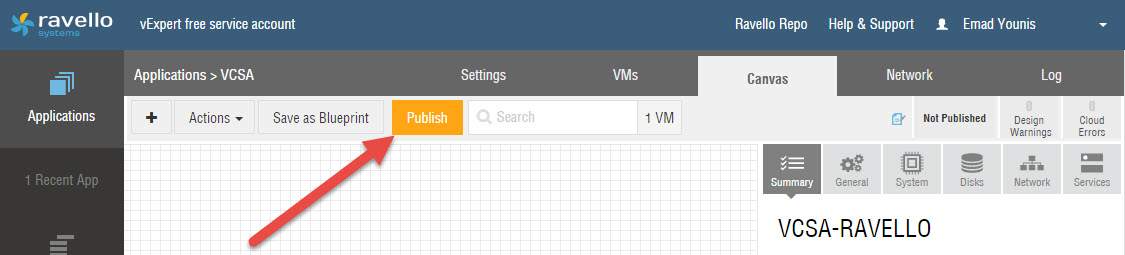
[table id=7 /] - After verifying all setting, save changes and click Publish.
![]()
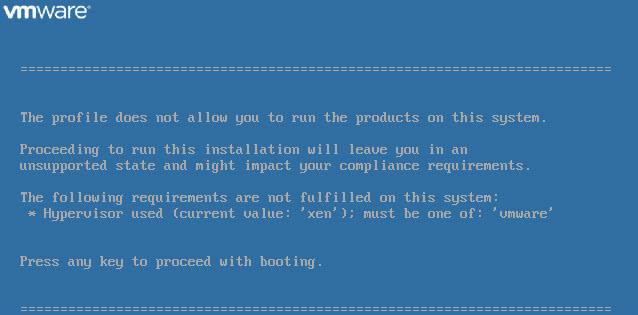
- Start the VCSA and launch the console when available.
- You will be greeted with the following warning message, for now press any key to continue. The VCSA will continue the start up process.
![]()
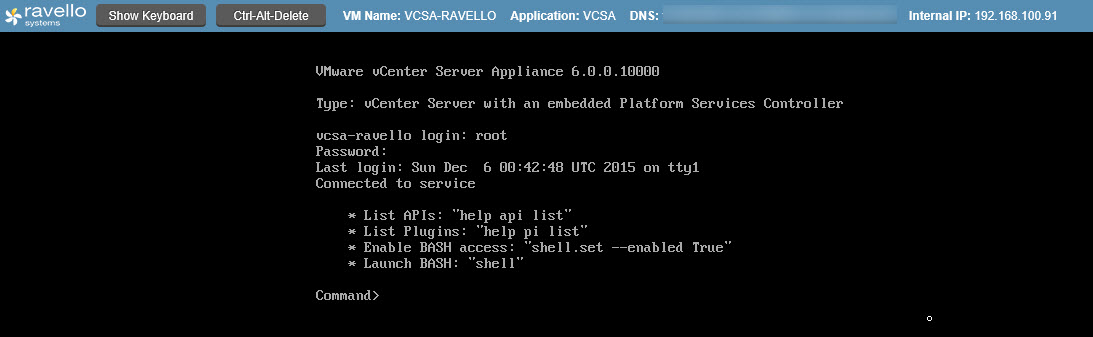
- Login the VCSA console (Alt-F1).
![]()
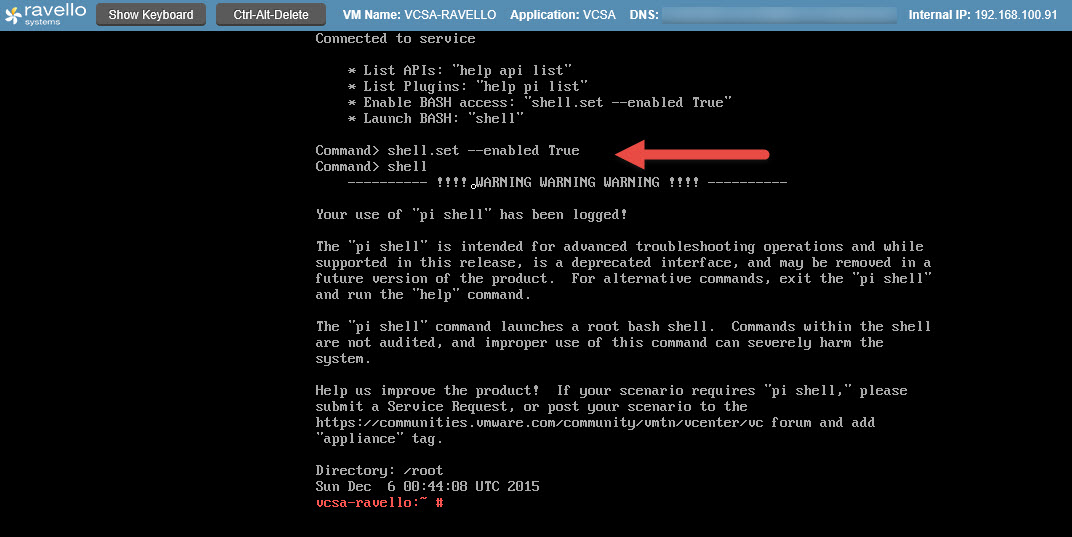
- Type “shell.set –enabled True“, hit enter and type “shell”
![]()
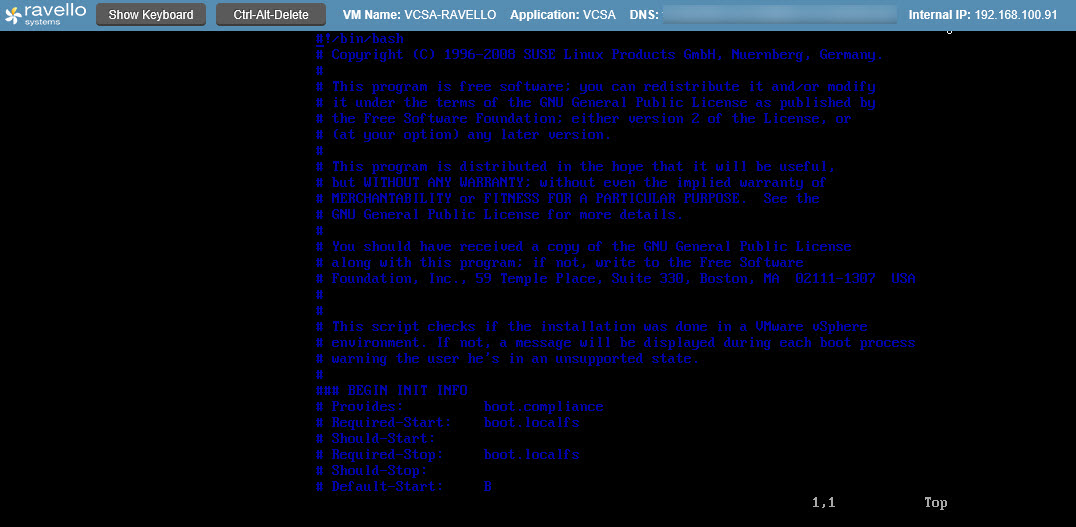
- Edit the boot.compliance script vi /etc/init.d/boot.compliance
![]()
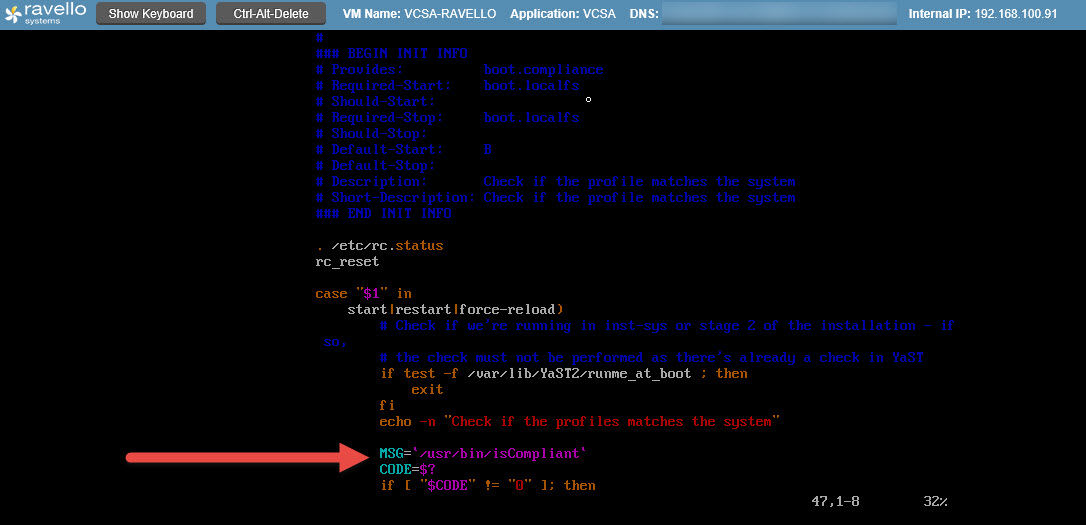
- Changes will be made to lines 47 and 48.
![]()
- Line 47 should read MSG = ‘/usr/bin/isCompliant -q’
- Line 48 should read CODE=0
![]()
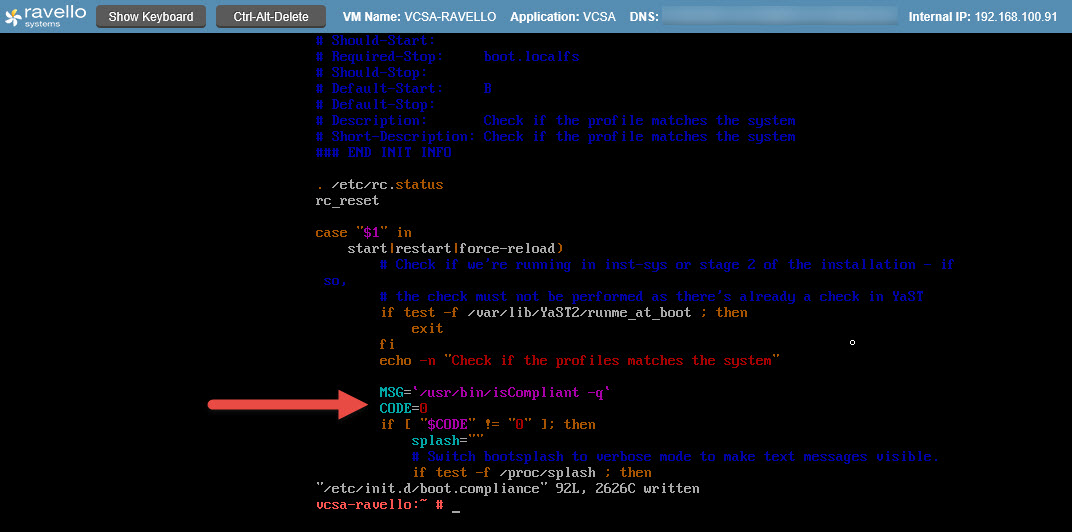
- Save changes and exit.
![]()
- Restart the VCSA to verify you no longer receive the boot warning.
- Now that the VCSA configurations are all done, time to save your hard work to the VM library for future use.
![]()


Web Client Access
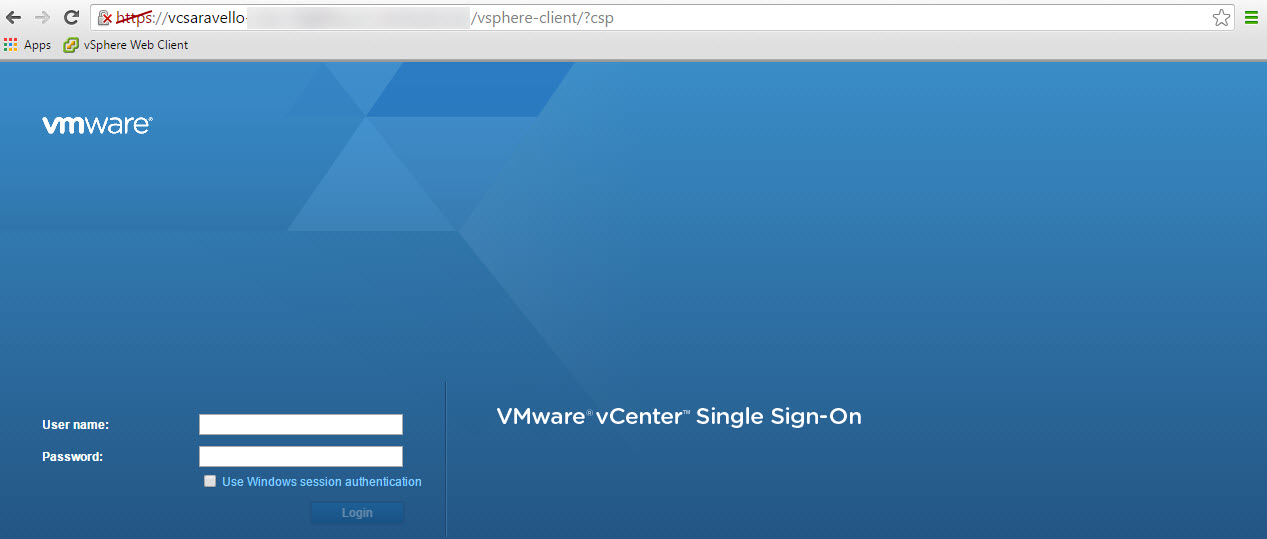
- To access the web client, from a web browser type “https://public IP address of the VCSA/vsphere-client”.
- Accept the self signed certificates.
- If you’re having issues accessing the web client, then there’s an issue with your DNS. Easy test is to edit the host file on your local machine adding the public IP address of the VCSA. Refresh your browser and see if you have access to the web client.
![]()
Note: Don’t forget that VCSA public IP address will change, so if it’s added to the host file on your machine you will need to change it.
There you have it, the VCSA can now be deployed directly on Ravello providing even more flexibility. Have fun building your lab in the cloud, I know I will.